


Intro #
Zeek is an open-source network security monitoring tool. It watches network traffic and turns it into detailed logs that can help you understand what is happening on a network. It is often used by security teams for:
- Detecting suspicious activity
- Investigating incidents
- Monitoring DNS, HTTP, SSL/TLS, SSH, FTP, SMTP, etc.
- Creating detailed network activity logs
- Building custom detection scripts
Zeek was formerly known as Bro. It is not mainly a packet sniffer like Wireshark, and it is not exactly an IDS like Snort or Suricata. Instead, Zeek is more of a network traffic analysis framework.
For example, Zeek can generate logs such as:
conn.log # network connections
dns.log # DNS queries
http.log # HTTP requests
ssl.log # TLS/SSL activity
files.log # files transferred over the network
notice.log # suspicious or notable events
A simple way to think about it:
Wireshark helps you inspect packets manually.
Snort/Suricata match traffic against signatures.
Zeek summarizes network behavior into rich, searchable logs and lets you script custom analysis.
It is commonly used in SOCs, threat hunting, incident response, and network forensics.
Geolocation enrichment in Zeek #
When analysing network traffic, it is often useful to include geolocation enrichment into the network logs. This makes it easier to notice any anomalous traffic from certain countries or regions. In this article, we’ll show how to add geolocation data into the Zeek network logs using the IP2Location LITE DB9 MMDB database. In our demo, we’ll be using a Debian 13 server so our steps will be specific to that operating system.
Installing Zeek #
Zeek provides official Debian 13 packages through the openSUSE Build Service repository.
Let’s run the commands below to install Zeek using root or sudo.
sudo apt update
sudo apt install curl gpg less
echo 'deb http://download.opensuse.org/repositories/security:/zeek/Debian_13/ /' | sudo tee /etc/apt/sources.list.d/security:zeek.list
curl -fsSL https://download.opensuse.org/repositories/security:zeek/Debian_13/Release.key | gpg --dearmor | sudo tee /etc/apt/trusted.gpg.d/security_zeek.gpg > /dev/null
sudo apt update
sudo apt install zeek
Remember to add the path to the executable as well.
echo 'export PATH=/opt/zeek/bin:$PATH' >> ~/.bashrc
source ~/.bashrc
Let’s check the version to make sure the path is working fine.
zeek --version
Checking the network interface #
Before we configure Zeek, we need to determine the network interface that is being used.
Run the below command to list out the interfaces.
ip a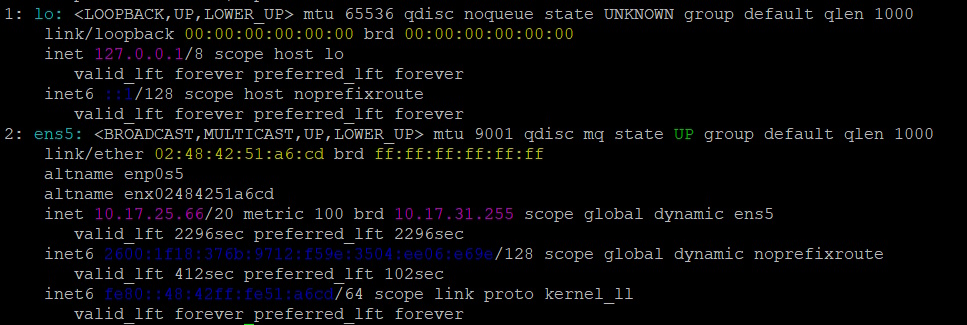
In our case, the network interface is ens5 and also note down our IP address. These 2 will be required later on.
Configure ZeekControl #
For a server/sensor, we normally manage Zeek with ZeekControl instead of running Zeek manually. Before using ZeekControl, we need to configure 2 files. The first one is /opt/zeek/etc/node.cfg and the second is /opt/zeek/etc/networks.cfg.
Let’s edit the node.cfg first which specifies how we want to run Zeek.
sudo nano /opt/zeek/etc/node.cfgWrite the below into that file. Modify the interface to fit your own machine.
[zeek]
type=standalone
host=localhost
interface=ens5
Save the file.
Next, let’s edit the networks.cfg that Zeek will use to identify private networks. In our case, we’ll just put the server IP as the private network.
sudo nano /opt/zeek/etc/networks.cfgWrite the below into the file.
10.17.25.66/32 This Debian serverSave the file.
Deploy and start Zeek #
Run the below to deploy and start Zeek.
sudo /opt/zeek/bin/zeekctl deployCheck the status.
sudo /opt/zeek/bin/zeekctl status
Check the conn.log for any entries #
Once Zeek is running, take a look at the conn.log to see if there is anything logged down so far.
sudo head -n 20 /opt/zeek/logs/current/conn.log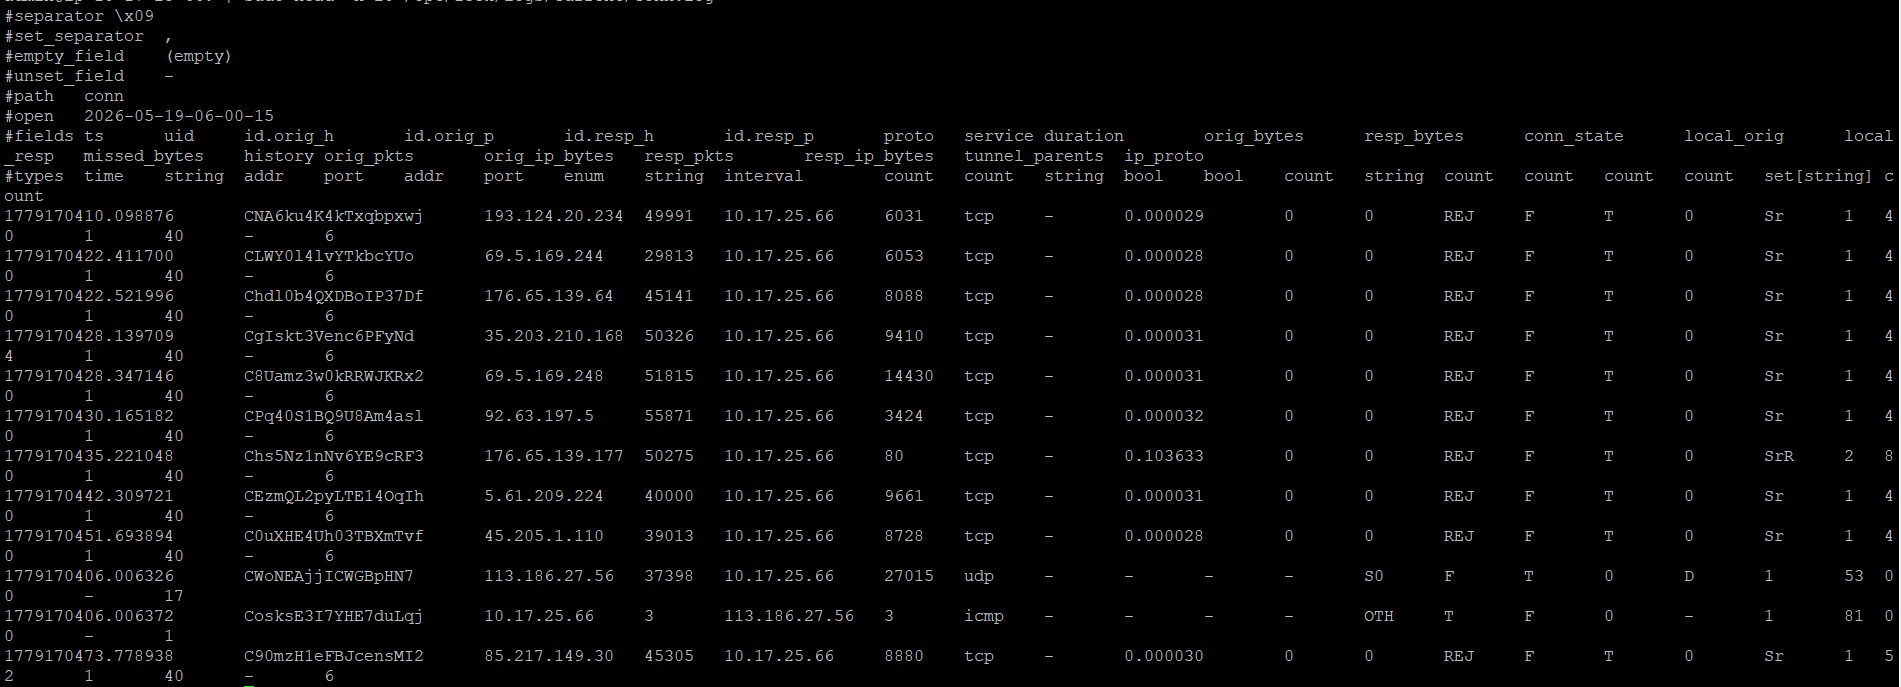
There are too many columns there so let’s try and filter out the more useful columns. Run the below and see what you get. The zeek-cut allows us to specify which columns we actually want to view.
sudo cat /opt/zeek/logs/current/conn.log | /opt/zeek/bin/zeek-cut id.orig_h id.resp_h id.resp_p proto service | less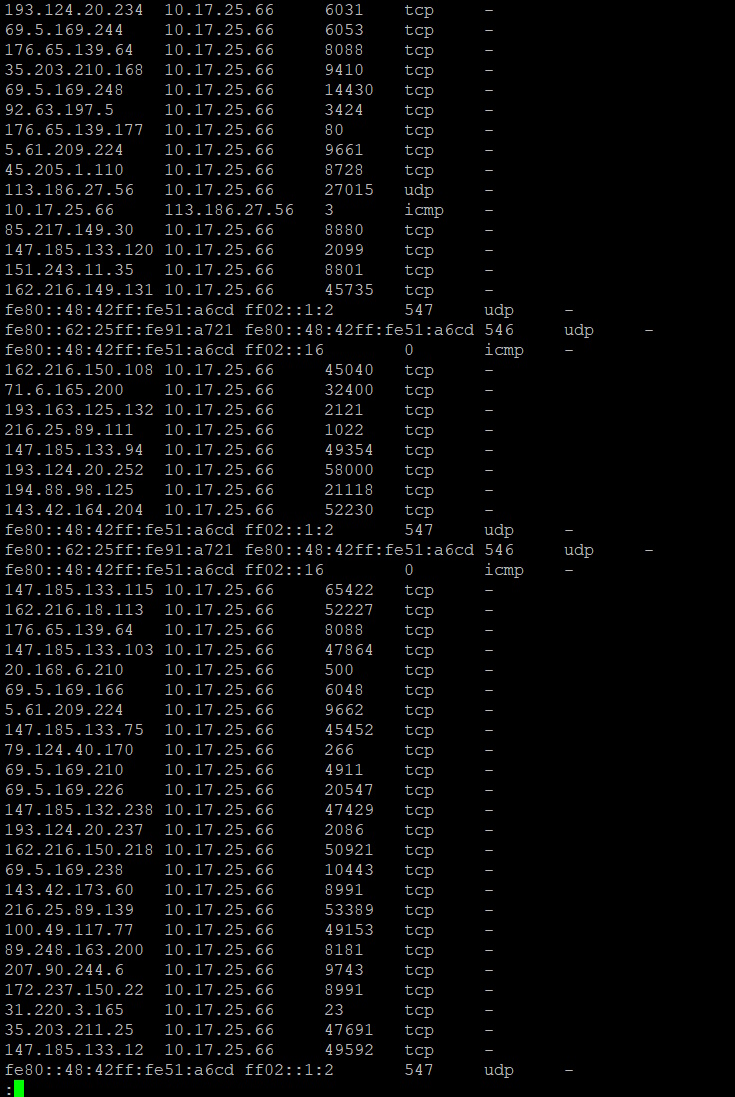
Download the IP2Location LITE DB9 MMDB data #
Now that Zeek is working, let’s enrich the logs with geolocation data using the IP2Location LITE DB9 MMDB database. If you don’t have an account, you can register for the free IP2Location LITE DB9 database at https://www.ip2location.com/database/lite. Upon login to the dashboard, you can click on the Download section and look for the below. Then, click on the download button.

Extract the IP2LOCATION-LITE-DB9.MMDB from your downloaded zipped file and rename it to GeoLite2-City.mmdb (must follow this filename exactly including the case). Upload it to your server under your home directory.
Next, run the following commands to move the file into the Zeek geolocation directory.
sudo mkdir -p /usr/share/GeoIP
sudo mv GeoLite2-City.mmdb /usr/share/GeoIP/
sudo chmod 644 /usr/share/GeoIP/GeoLite2-City.mmdb
Run the below to test and see if the geolocation is working now.
/opt/zeek/bin/zeek -e "print lookup_location(8.8.8.8);"
Create the Zeek script #
This Zeek script that we’re creating is the one that will append geolocation data into the conn.log file. Let’s create the script.
sudo nano /opt/zeek/share/zeek/site/conn-geoip.zeekPaste the below code into that file.
@load base/protocols/conn

# Add GeoIP columns to conn.log.
redef record Conn::Info += {
    orig_country: string &log &optional;
    orig_region:  string &log &optional;
    orig_city:    string &log &optional;
    orig_lat:     double &log &optional;
    orig_lon:     double &log &optional;

    resp_country: string &log &optional;
    resp_region:  string &log &optional;
    resp_city:    string &log &optional;
    resp_lat:     double &log &optional;
    resp_lon:     double &log &optional;
};

event connection_state_remove(c: connection)
    {
    if ( ! c?$conn )
        return;

    local orig_loc = lookup_location(c$id$orig_h);

    if ( orig_loc?$country_code )
        c$conn$orig_country = orig_loc$country_code;

    if ( orig_loc?$region )
        c$conn$orig_region = orig_loc$region;

    if ( orig_loc?$city )
        c$conn$orig_city = orig_loc$city;

    if ( orig_loc?$latitude )
        c$conn$orig_lat = orig_loc$latitude;

    if ( orig_loc?$longitude )
        c$conn$orig_lon = orig_loc$longitude;


    local resp_loc = lookup_location(c$id$resp_h);

    if ( resp_loc?$country_code )
        c$conn$resp_country = resp_loc$country_code;

    if ( resp_loc?$region )
        c$conn$resp_region = resp_loc$region;

    if ( resp_loc?$city )
        c$conn$resp_city = resp_loc$city;

    if ( resp_loc?$latitude )
        c$conn$resp_lat = resp_loc$latitude;

    if ( resp_loc?$longitude )
        c$conn$resp_lon = resp_loc$longitude;
    }
Save the file.
Load the Zeek script #
Edit the file below.
sudo nano /opt/zeek/share/zeek/site/local.zeekNear the bottom of the file, add this line.
@load ./conn-geoipSave the file.
Run the below to test and make sure no errors appear.
/opt/zeek/bin/zeek /opt/zeek/share/zeek/site/conn-geoip.zeekRestart Zeek and check the conn.log again #
Run the below to check the configuration and deploy Zeek with latest changes.
sudo /opt/zeek/bin/zeekctl check
sudo /opt/zeek/bin/zeekctl deploy
Let’s check the conn.log and see if the geolocation data has been appended.
sudo head -n 20 /opt/zeek/logs/current/conn.log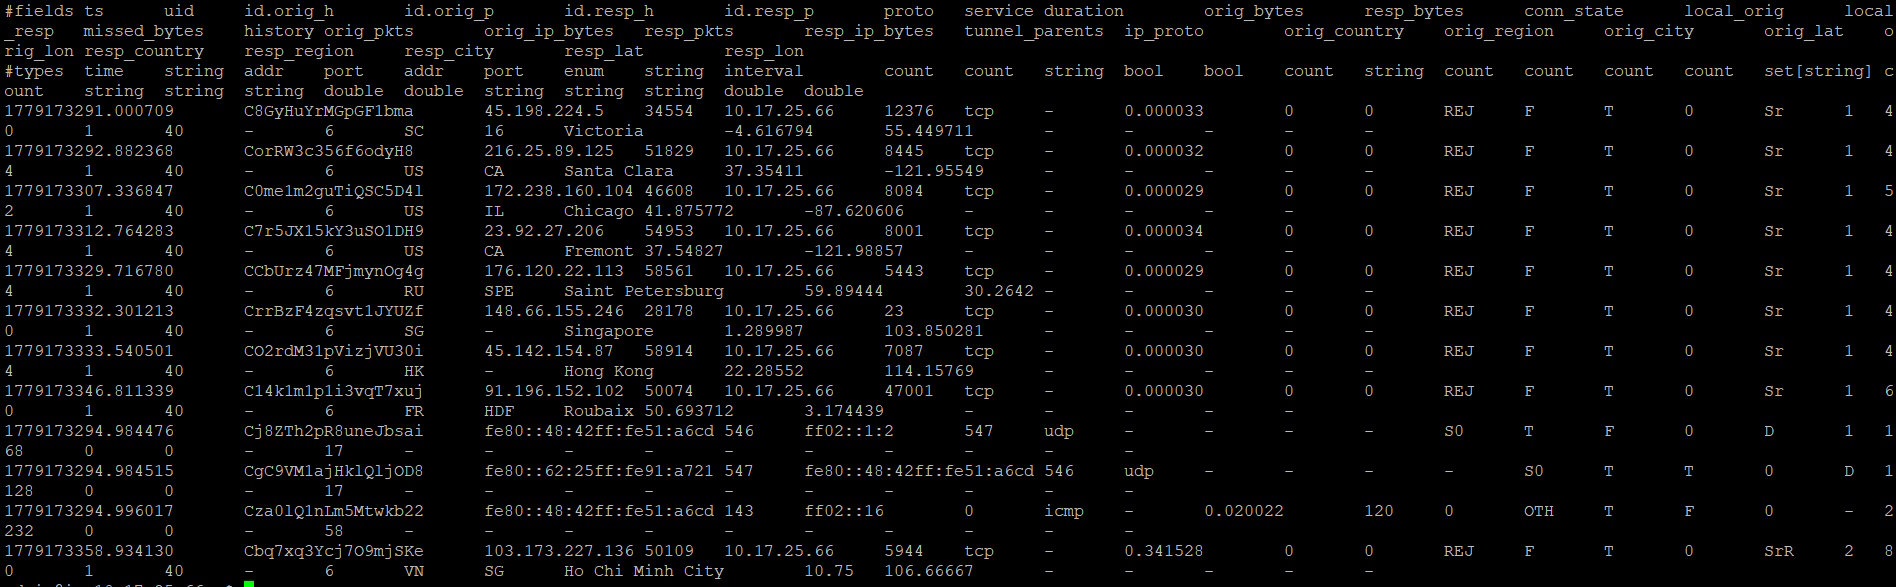
As you can see above, there are new fields appearing in the log.
Let’s run the below command to filter the important columns.
sudo cat /opt/zeek/logs/current/conn.log | /opt/zeek/bin/zeek-cut id.orig_h id.resp_h proto service orig_country orig_region orig_city resp_country resp_region resp_city | less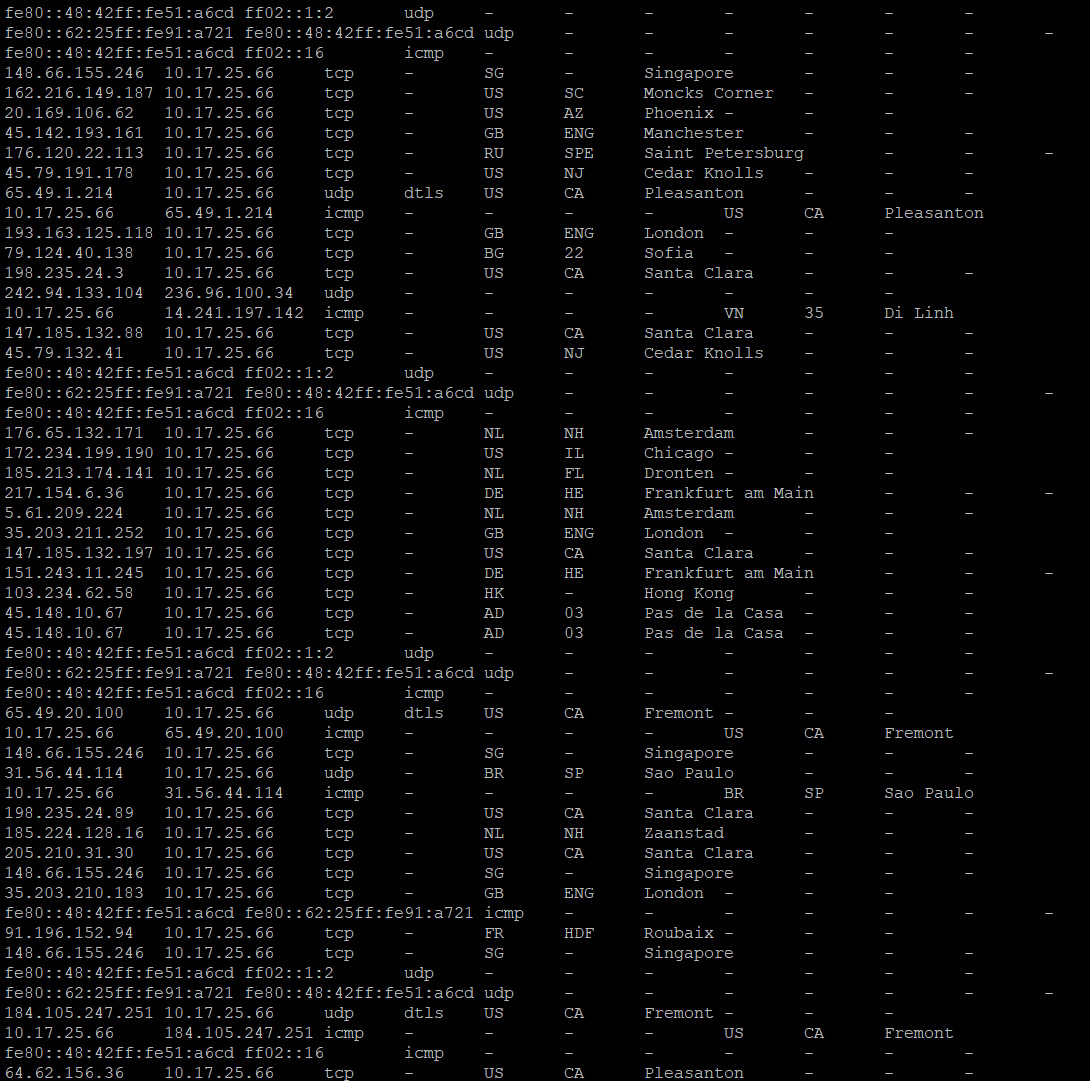
Conclusion #
Hopefully our simple guide above has shown you how easily you can enrich your Zeek logs with geolocation data using the IP2Location LITE DB9 MMDB database. With such enhanced data, it will make it easier to notice any abnormalities in your server traffic and allow faster responses in case of attacks.


