
In this tutorial, we will be using IP2Location IP Geolocation LITE database as sample database. It is a free database. You may use other CSV file, the process will be the same.
1. Open or create a new database for the CSV data.
2. You may create a new table and prepare all the fields needed or you may just import the CSV data to create the new table.
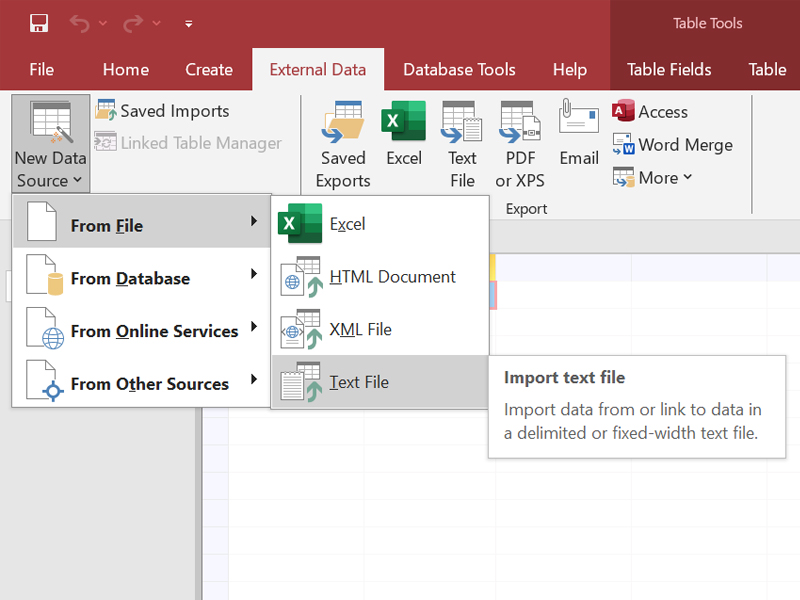
3. Go to the “New Data Source” tab on Microsoft Access, click on “From File” then “Text File” as shown in the screenshot below.
4. Next, you will see a new pop up window. Select the CSV file by clicking the “Browse..” button. (*Note: the file name must be less than 64 characters otherwise Microsoft Access will not be able to import it).
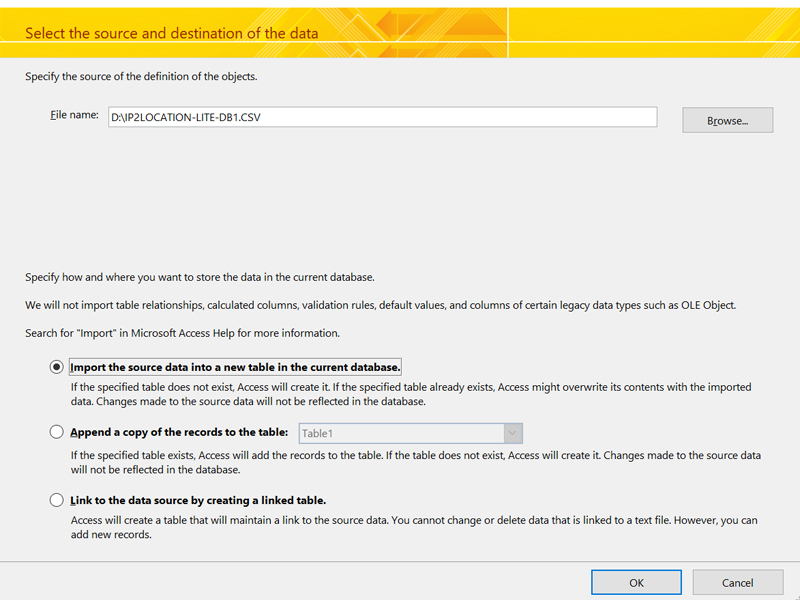
5. After selecting the CSV file, if you created your own table, choose the “Append a copy of the records to the table.” option and select the table from the drop-down list. If you did not create your own table then you will need to choose “Import the source data into a new table in the current database.” option. After selecting the option, press “OK” to continue.
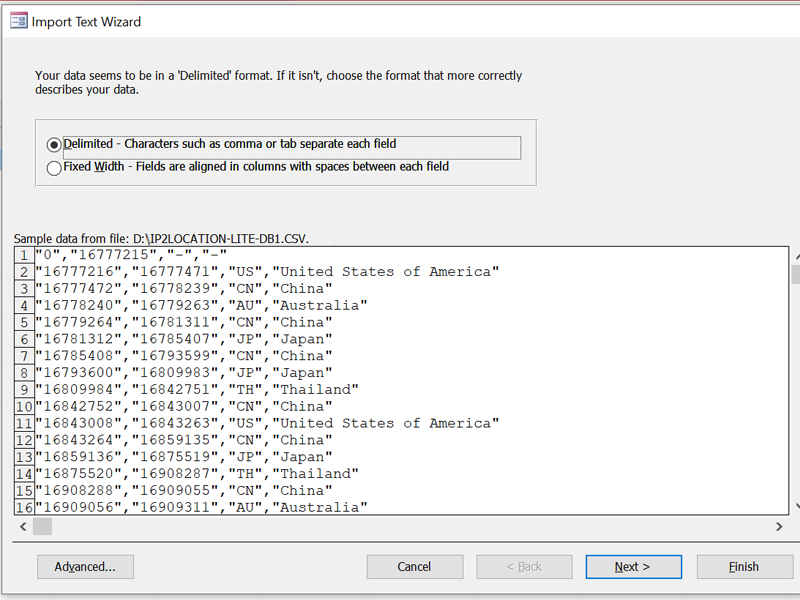
6. Next, make sure the option “Delimited – Characters such as comma or tab separate each field” is selected as shown in screenshot below and click “Next”.
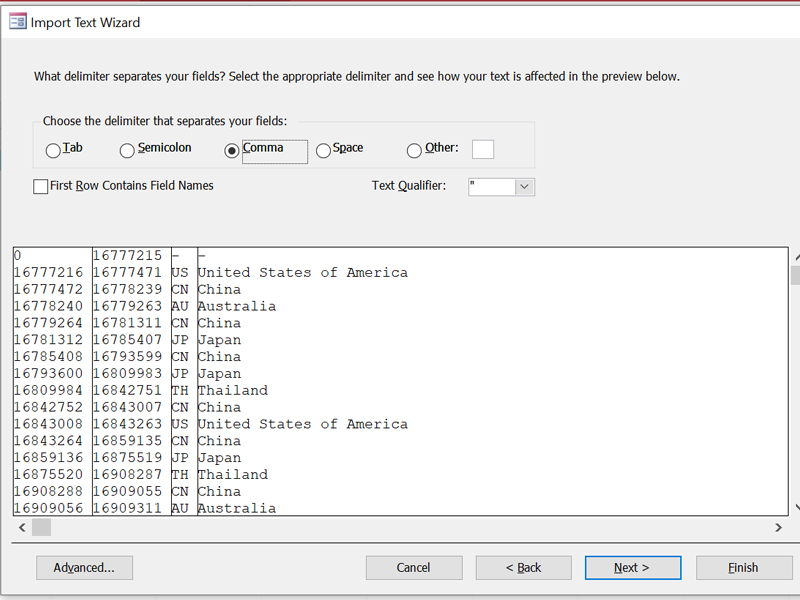
7. Next, make sure “Comma” is selected in the “Choose the delimiter that separates your fields” and the double quotes symbol ” is selected in the “Text Qualifier” as shown in screenshot below and click “Next” to continue. *Note: Users who created their own table with their own field names may skip the rest and click “Next” or “Finish” to complete the import in step 7.
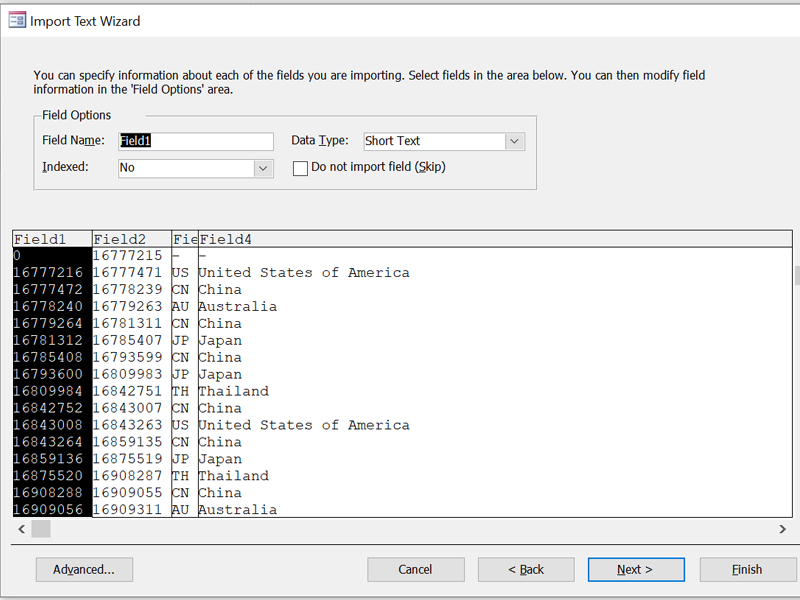
8. Noq, you may choose the field and rename it for each of the columns for the CSV data, then, click “Next” to proceed.
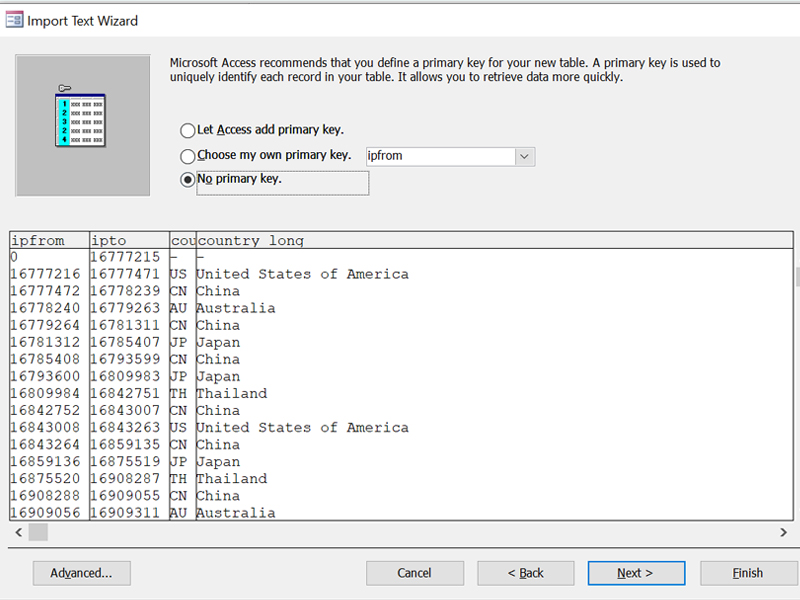
9. After that, you may choose to add a primary key to this table, choose a field as a primary key or no primary key for this table. Adding a primary key to the table will add another column on the left, while choosing a field as primary key will let users choose afield from the drop-down list as the primary key.
10. After selecting your option, click “Next” or “Finish” to complete the import and you are done.


