
Intro #
GoAccess is an open-source real-time web log analyzer and interactive viewer designed for quickly analyzing web server traffic directly from terminal or browser-based dashboards. It can process logs from servers such as Nginx, Apache, Caddy, and others, providing live insights into visitors, requests, bandwidth usage, response codes, referrers, user agents, geolocation data, ASN information, and more.
GoAccess supports real-time HTML dashboards via WebSocket streaming, allowing administrators to monitor traffic as it happens, and can integrate with GeoIP2/MMDB databases for geographic visualization and analytics. It is lightweight, fast, and optimized to handle large log files efficiently, making it popular for server monitoring, traffic analysis, security investigation, and operational troubleshooting.
In this article, we’ll demonstrate how to use IP2Location MMDB databases to provide geolocation enrichment into the GoAccess web UI to monitor our Nginx website log. Our demo machine is a Debian 12, therefore some of the steps below are specific to that operating system.
Installing GoAccess #
As mentioned above, our machine is a Debian 12, so we’ll be using the installation steps specific to our system. If you’re on another operating system, you will need to check out the installation steps for your system.
To install, we’ll run the below command:
sudo apt update
sudo apt install goaccess
Download the IP2Location LITE DB11 MMDB database #
If you don’t have an account, you can register for the free IP2Location LITE DB11 database at https://www.ip2location.com/database/lite. Upon login to the dashboard, you can click on the Download section and look for the below. Then, click on the download button.

Extract the IP2LOCATION-LITE-DB11.MMDB from your downloaded zipped file. Upload it to your web server. Remember where you stored this MMDB file. In our case, we’ll store the MMDB file in /usr/share/GeoIP/IP2LOCATION-LITE-DB11.MMDB but you can choose your own location. Just make sure that the user running the goaccess command has permission to read that file.
TIP: If you wish to automate the download of the zipped file, you can refer to the download documentation.
Adding Nginx reverse proxy into our website #
In our example, we’ll be calling the GoAccess in a real-time mode, therefore we will need to specify a WebSocket to continuously stream updates to the HTML dashboard page. The default WebSocket will be using port 7890.
E.g. http://<server IP>:7890
To avoid the need for opening another port on our firewall and to bypass the non-SSL nature of the WebSocket which can trip up some browsers, we’ll need to add a reverse proxy into our Nginx configuration file.
Edit your website Nginx config to add the below section:
location /ws {
    proxy_pass http://127.0.0.1:7890;
    proxy_http_version 1.1;
    proxy_set_header Upgrade $http_upgrade;
    proxy_set_header Connection "Upgrade";
    proxy_set_header Host $host;
}
Then, restart the Nginx.
sudo systemctl restart nginxLet’s try the goaccess command #
Run the below command to start the goaccess process.
goaccess /var/log/nginx/<YOUR WEBSITE>-access.log \
  --log-format=COMBINED \
  --real-time-html \
  --ws-url=wss://<YOUR WEBSITE>/ws \
  --geoip-database=/usr/share/GeoIP/IP2LOCATION-LITE-DB11.MMDB \
  -o /var/www/<YOUR WEBSITE>/goaccess.html
Just replace <YOUR WEBSITE> with your own domain name. Note the ws-url param which specifies the WebSocket connection to retrieve latest data.
If there is no error, you should see something like below which means you can now view the web dashboard.

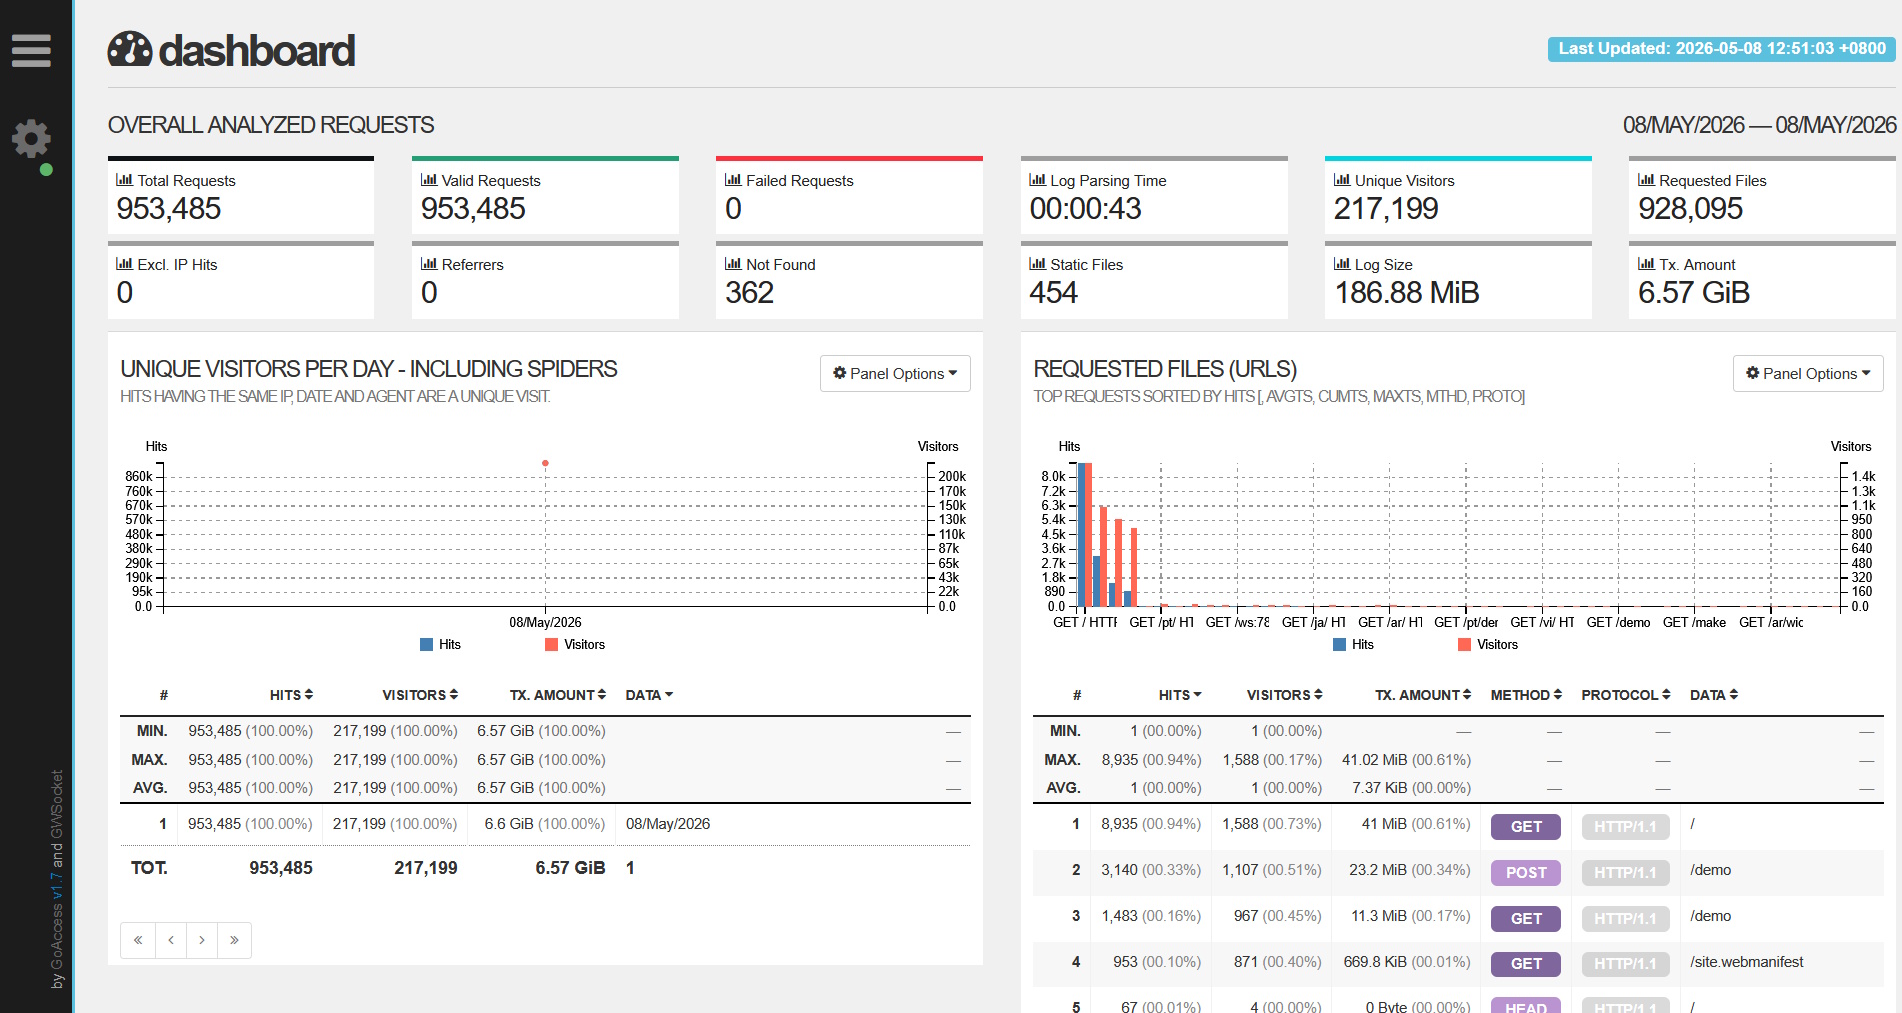
View the GoAccess web dashboard #
In your browser, you can navigate to https://<YOUR WEBSITE>/goaccess.html and see something like the below.
If you don’t see any updates on the statistics, that most likely means your browser is not able to access the WebSocket address. You can use the developer tools in your browser to debug this issue. We won’t cover this part here.
View the geolocation data #
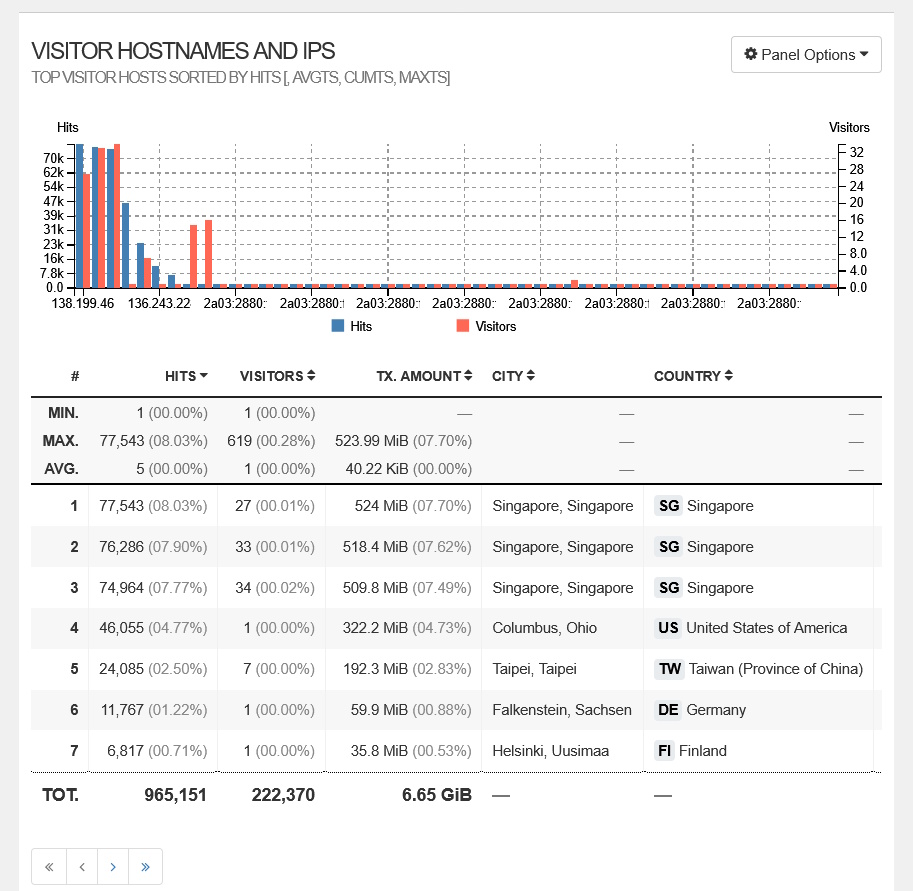
Now that the web UI is able to load successfully, let’s take a look at the VISITOR HOSTNAMES AND IPS panel. If your MMDB database was loaded properly, you should see the CITY and COUNTRY columns populated with data.
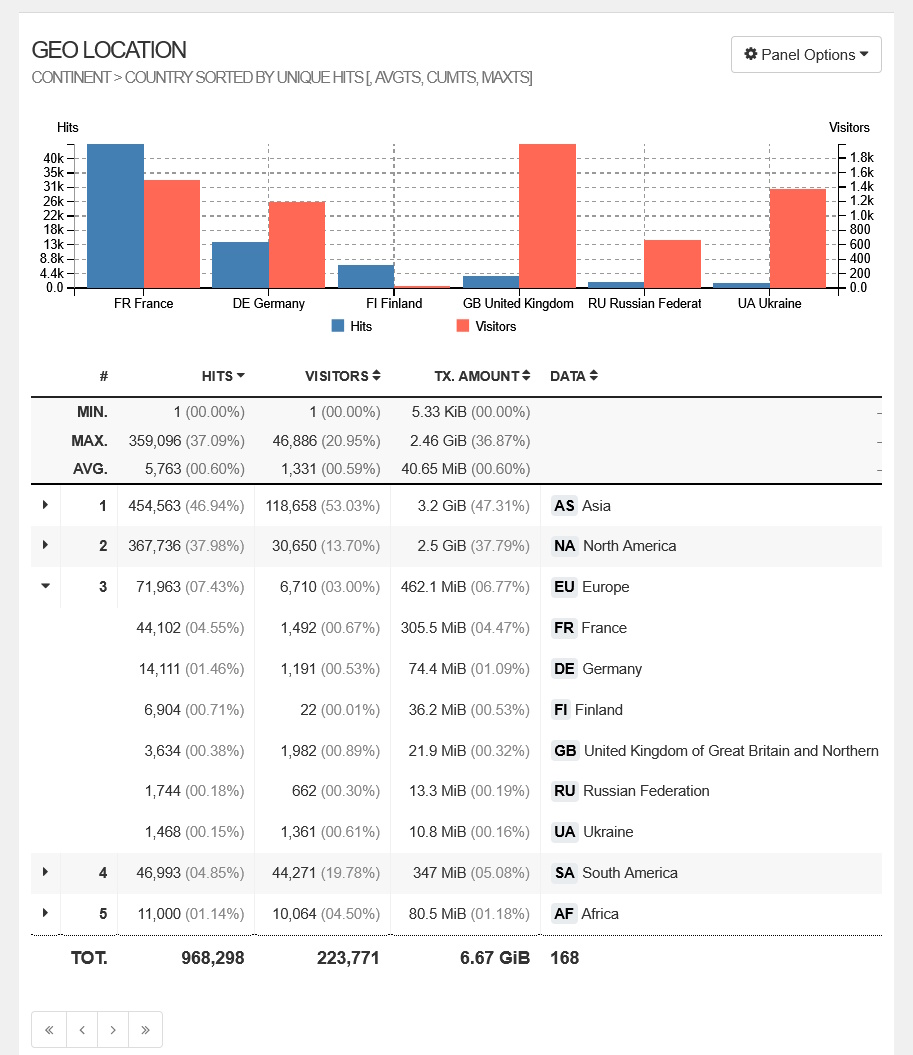
Scroll further down and you’ll also see the GEO LOCATION panel. The initial view is by continent and if you click on a particular line, it will expand the details into the countries within the continent.
Conclusion #
There you go. Our fast and simple guide to enabling geolocation enrichment into the GoAccess dashboard to make monitoring your website traffic that much easier to handle. For more advanced usages of GoAccess, please refer to the GoAccess website or the GoAccess GitHub.
Do note that the free IP2Location DB11 LITE database is not as accurate as the commercial database. Therefore, if you want more accurate information, you can subscribe to the paid DB11 database and replace the above steps with the correct filenames.


