In this tutorial, we are going to share with you how to create a custom report in Matomo. In this custom report, we will display the country code, region name, city name, latitude and longitude information of the visitors’ IP address. Before we could generate the custom report, we need a plugin to host the report. For this, we will use the IP2Location plugin. We also need an IP database to obtain the relevant geo location information for display. For this, we will use the IP2Location DB5 BIN database.
Please take note that knowledge of PHP programming languages is required for this tutorial.
Before getting started, you will need to install the IP2Location Matomo plugin and download the IP2Location database.
Instructions are as below:
- Install the IP2Location Matomo plugin. You may find the installation steps at https://github.com/ip2location/ip2location-piwik.
- Download IP2Location DB5 BIN database or you can consider to download the IP2Location LITE database which is free.
- Unzip the downloaded data file.
- Copy the BIN file (ended with .BIN extension) into /misc inside Piwik folder where you installed the platform.

After that, follow the steps below to create the custom report.
- Before you can create the custom report, you need to turn on the developer mode. Go to the installed Piwik folder, and enter the below command.
./console development:enable
- Create a custom report by entering the below command.
./console generate:report
- This command will prompt you through several questions for the custom report creation. Please enter the value as below:
- Enter IP2Location for plugin name.
- Enter IP2Location Report for the report name.
- Enter Visitors for the report category.
- Leave empty for the rest of the questions.
- The console will then create a file called GetIP2LocationReport.php inside plugins/IP2Location/Reports folder. In addition, the console will also add the getIP2LocationReport function into the plugins/IP2Location/API.php file.
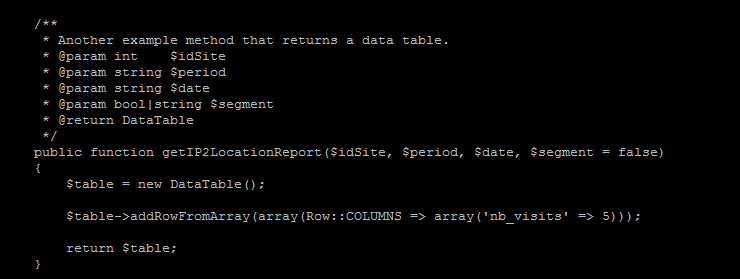
- Open the API.php file and look for the getIP2LocationReport function. You shall see the below default function added.
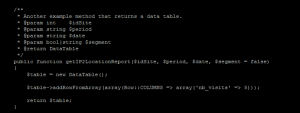
- This function will be invoked whenever the user views the IP2Location Report custom report. Therefore, this shall be the place to put in the code to display the geolocation information that we want.
- Replace the function with the below codes. Basically, this code will get the visitor details from Live.getLastVisitsDetailsAPI based on the filters parameter supplied. After that, the code will recursively fetch the record of each visit, get the IP address, and then call the IP2Location lookup function for country, region, city, latitude and longitude information.
public function getIP2LocationReport($idSite, $period, $date, $segment = false) { $table = new DataTable(); $table->addRowFromArray([Row::COLUMNS => ['nb_visits' => 5]]); $data = PiwikAPIRequest::processRequest('Live.getLastVisitsDetails', [ 'idSite' => $idSite, 'period' => $period, 'date' => $date, 'segment' => $segment, 'numLastVisitorsToFetch' => 100, 'minTimestamp' => false, 'flat' => false, 'doNotFetchActions' => true, ]); $data->applyQueuedFilters(); // Create a new database $result = $data->getEmptyClone($keepFilters = false); require_once PIWIK_INCLUDE_PATH . '/plugins/IP2Location/lib/IP2Location.php'; $db = new IP2LocationDatabase(PIWIK_INCLUDE_PATH . '/misc/' . $this->getDatabaseFile(), IP2LocationDatabase::FILE_IO); foreach ($data->getRows() as $visitRow) { // Get the visitor IP $visitor_ip = $visitRow->getColumn('visitIp'); // Look up for geo location information using IP2Location plugin $response = $db->lookup($visitor_ip, IP2LocationDatabase::ALL); $table->addRowFromSimpleArray([ 'ip_address' => $visitor_ip, 'ip_country' => $response['countryCode'], 'ip_region' => $response['regionName'], 'ip_city' => $response['cityName'], 'ip_latitude' => $response['latitude'], 'ip_longitude' => $response['longitude'], ]); } return $table; } - Save the API.php file.
- Open GetIP2LocationReport.php for editing.
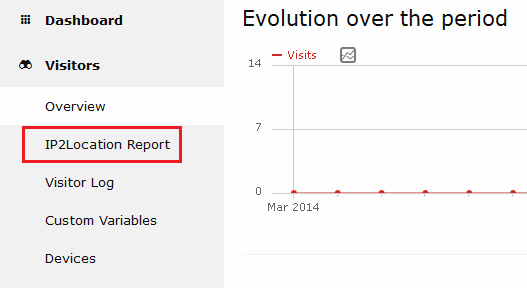
- Inside the Init() function, enter the menu title for this report so that IP2Location Report will be shown under Visitors report section.
$this->subcategoryId = 'IP2Location Report';
- Inside the Init() function, define the array of the table data. This data array will be used to keep the geolocation information for display that we added in the getIP2LocationReport function.
$this->metrics = array('ip_address','ip_country', 'ip_region', 'ip_city', 'ip_latitude', 'ip_longitude'); - Inside the configureView function, configure the column headers for display.
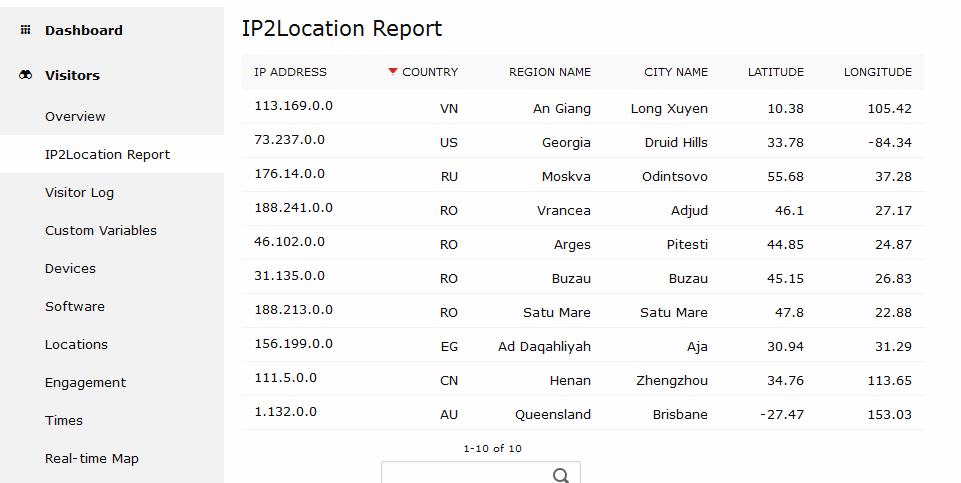
$view->config->addTranslation('ip_address', 'IP Address'); $view->config->addTranslation('ip_country', 'Country'); $view->config->addTranslation('ip_region', 'Region Name'); $view->config->addTranslation('ip_city', 'City Name'); $view->config->addTranslation('ip_latitude', 'Latitude'); $view->config->addTranslation('ip_longitude', 'Longitude'); - You can now go to the admin area and view the report that you have just created. Below is the example of the report.