

Cerb is a web-based application designed for tasks automation and enterprise communication. With a history spanning over 22 years, Cerb continues their improvement based on feedback from a multitude of teams around the world. User can run Cerb on their own hardware, in Docker, or in Cerb Cloud as a fully managed service.
Cerb allows API integration by using two features called automations and interactions. Automations add conditional actions to any event, while interactions extend any toolbar for complex multi-step workflows that require user input. By doing so, user can make use of any API service to extend the Cerb feature. For example, they can use an external API service to get geolocation information before moving to the next step.
IP2Location.io is a geolocation API service that can provide fast and accurate IP geolocation data to determine a user’s location and use the geolocation information in different use cases. User can get geolocation information such as country, region, city plus proxy detection.
In this article, we will shows how to use the IP2Location.io API in Cerb to get geolocation data. We will also brief on how to install Cerb in your local machine with Docker.
Prerequisites #
Before we start, please ensure that the Docker and Git are installed in your local machine, as both will be used in Cerb installation process. The IP2Location.io API requires an API key to function. You may sign up for a free API key if you do not have one. Please note that the continent, country, region and city translations are only available in the IP2Location.io Plus and Security plans.
Install Cerb in local machine #
- Clone the latest release of Cerb into your machine by using git. For example, if the latest release is v10.4, you can close the release by running this command:
git clone -b v10.4 https://github.com/cerb/cerb-release.git v10.4. - Navigate to the cloned release just now by
cd v10.4. - Navigate to the docker file directory in the release by
cd install/docker. - Run docker compose up –build to build and start the container for Cerb. The initial run will take a few minutes to complete the build of the container image. Subsequent runs will start the container almost immediately. Once the build process is complete and it starts running, you can then open your browser and navigate to the http://localhost/. The cerb guided installer will prompt you for all necessary information to complete the installation.
Step-by-step guide to use the IP2Location.io API in Cerb #
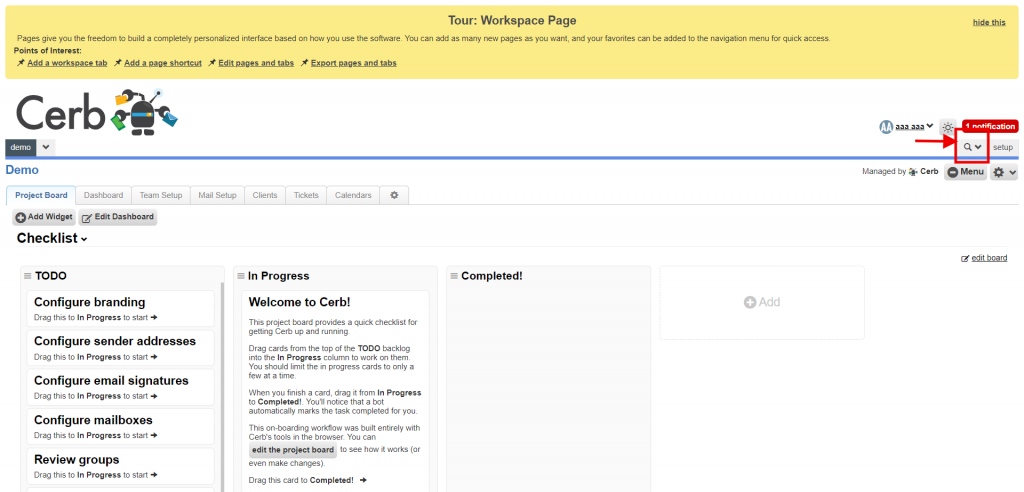
- Login to your Cerb dashboard if haven’t, and then click on the search icon as shown in the screenshot.
- Click on the “(show all record types)”, look for the “Connected Services” and click on it.
- Click on the + icon to add the IP2Location.io API.
- Enter the following information to the form, and click the “Save Changes” button:
| Field | Value |
| Name: | ip2location |
| URI: | ip2location |
| Type: | API Key |
| Base URL: | https://api.ip2location.io/ |
| API Key Name: | key |
| API Key Location: | URL parameter |
- After that, go back to the dashboard, and click the search icon showed in the step 1. Click on the “(show all record types)”, this time look for the “Connected Accounts” and click on it. Click on the + icon to add your IP2Location.io API key into Cerb.
- Click “ip2location” from the selection, enter the following information to the form, and click the “Save Changes” button:
| Field | Value |
| Name: | ip2location |
| URI: | ip2location |
| API Key: | (Copy from IP2Location.io dashboard) |
- Now you can use IP2Location.io API to get the geolocation information. To do so, first click the search icon showed in the step 1. Click on the “(show all record types)”, this time look for the “Automations” and click on it. Click on the + icon to add new automation in Cerb.
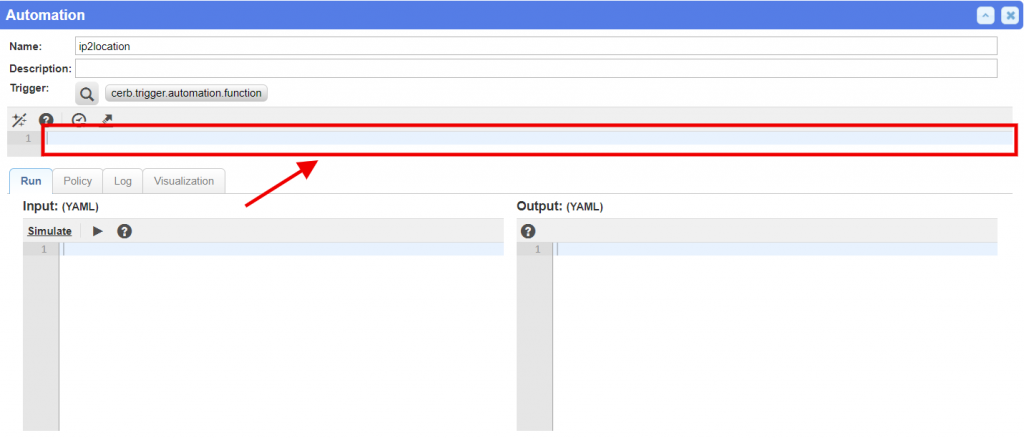
- A popup form will be appear on the screen. Enter “ip2location” in the Name field. Set the trigger type as “cerb.trigger.automation.function”. After that, paste the following code into the text field as shown here:
inputs:
  text/ip:
    type: ip
    required@bool: yes

start:
  http.request:
    output: http_response
    inputs:
      method: GET
      url: https://api.ip2location.io/{{inputs.ip|url_encode}}
      authentication: cerb:connected_account:ip2location
    on_success:
      return:
        data@json: {{http_response.body}}
    on_error:
      error: {{http_response.error}}
- You will also need to add a policy for the automation as recommended by Cerb. Click on the “Policy” tab, and paste the following content into the text field after the line “commands:”
  http.request:
    deny/url@bool: {{inputs.url is not prefixed ('https://api.ip2location.io/')}}
    deny/account@bool: {{inputs.authentication not in ['cerb:connected_account:ip2location']}}
    allow@bool: yes
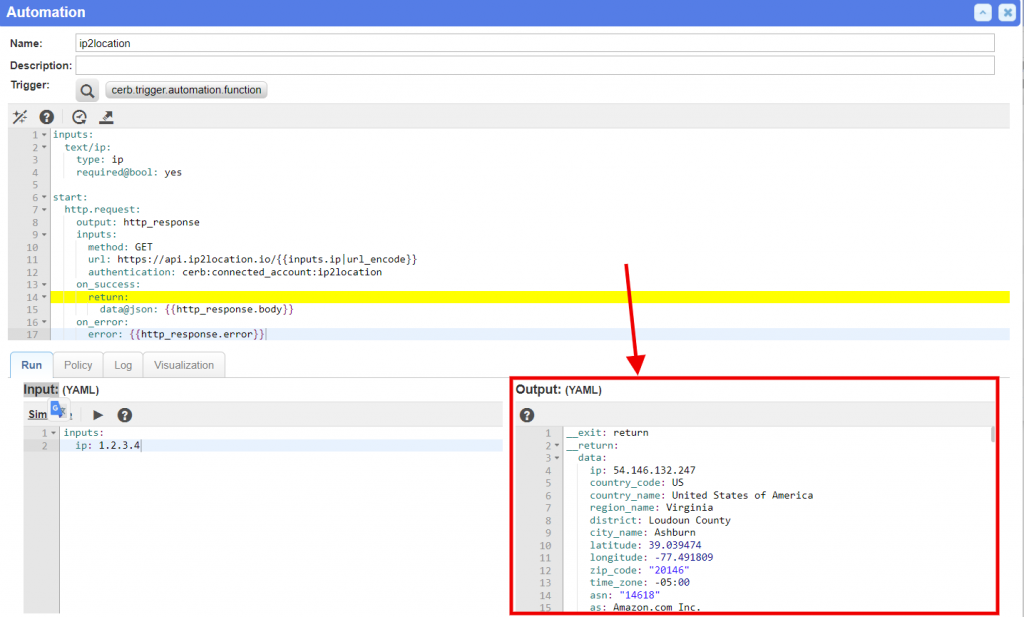
- That’s all. Now you can try by using the following code. Click on the “Run” tab, and paste the code at the text field in the Input section:
inputs:
  ip: 1.2.3.4
- Click on the triangle button to run the automation. If the run is success, you will see the output being shown in the Output section as shown in the screenshot. Click the “Save Changes” button to save the automation if you are satisfied with it.
Conclusion #
This article demonstrates a basic usage of the IP2Location.io API in Cerb, along with the installation of Cerb using Docker. At the completion of this article, you will be able to perform an IP geolocation lookup by using the IP2Location.io API. This will give you more information on an IP address such as geolocation and proxy. These information can be helpful in later analysis, or security enhancement.


