

Intro #
ntopng is a web-based network traffic monitoring and analysis tool that provides real-time visibility into hosts, flows, protocols, applications, bandwidth usage, and network conversations. It can inspect traffic from a network interface, identify top talkers, detect protocols using deep packet inspection, display geolocation and ASN information, generate alerts, and present the data through an interactive dashboard. It is commonly used by network administrators, security teams, and system operators to understand how network bandwidth is being used, detect unusual activity, and monitor the health and behavior of a network.
In this article, we’ll show how to replace the geolocation database in ntopng with the free IP2Location LITE MMDB database.
Installing ntopng #
Following the installation steps in ntopng.org, we will be using the Debian 12 steps as our demo machine is a Debian 12. If you’re on a different operating system, please refer to the installation steps page and follow the instructions there.
wget https://packages.ntop.org/apt/bookworm/all/apt-ntop.deb
sudo apt install ./apt-ntop.deb
sudo apt update
sudo apt install ntopng
ntopng should now be installed as a service.
Download the IP2Location LITE DB9 MMDB & ASN databases #
We’ll be using the IP2Location LITE DB9 MMDB database to provide the city-level geolocation data. If you don’t have an account, you can register for the free IP2Location LITE DB9 database at https://www.ip2location.com/database/lite. Upon login to the dashboard, you can click on the Download section and look for the below. Then, click on the download button.

Extract the IP2LOCATION-LITE-DB9.MMDB from your downloaded zipped file and rename it to GeoLite2-City.mmdb (must follow this filename exactly including the case). Upload it to your web server in /usr/share/ntopng/httpdocs/geoip/ (default location for the MMDB files in ntopng).
Next, we’ll also download the IP2Location LITE ASN MMDB database for the ASN-specific network data. Look for the below and click on the download button.

Extract the IP2LOCATION-LITE-ASN.MMDB from your downloaded zipped file and rename it to GeoLite2-ASN.mmdb (must follow this filename exactly including the case). Upload it to your web server in /usr/share/ntopng/httpdocs/geoip/ (default location for the MMDB files in ntopng).
TIP: If you wish to automate the download of the zipped file, you can refer to the download documentation.
Optional: Configure the geolocation for ntopng #
Only do this if your filenames or folder is not following the default. In our case, it automatically detected the files when we followed the exact path and filenames. We did not have to configure the ntopng.conf below with the path to the MMDB files.
If your ntopng is not reading the MMDB files, then you should do the below to edit the ntopng configuration file and override the default geolocation data source with our 2 new IP2location MMDB files.
sudo nano /etc/ntopng/ntopng.confAdd the 2 lines below into the configuration file.
--geoip-city /usr/share/ntopng/httpdocs/geoip/GeoLite2-City.mmdb
--geoip-asn /usr/share/ntopng/httpdocs/geoip/GeoLite2-ASN.mmdb
Specify the network interface for ntopng to read from #
In the configuration file above, make sure you have configured which network interface to read from. In our case, it was eth0. You can modify to suit your own interface.
Add the below line into the config as well.
-i=eth0Restart the ntopng service for the changes #
Run the below to restart the ntopng service for the changes to take effect.
sudo systemctl restart ntopngLet’s take a look at the ntopng web dashboard #
In your browser, navigate to to http://<YOUR SERVER IP>:3000 and see if the dashboard appears or not. You may need to open up port 3000 on your firewall.

Since it’s your first time logging in, just enter the default credentials as shown in the page. Upon first login, you’ll be prompted to change your password. Just do so and you’re in business.
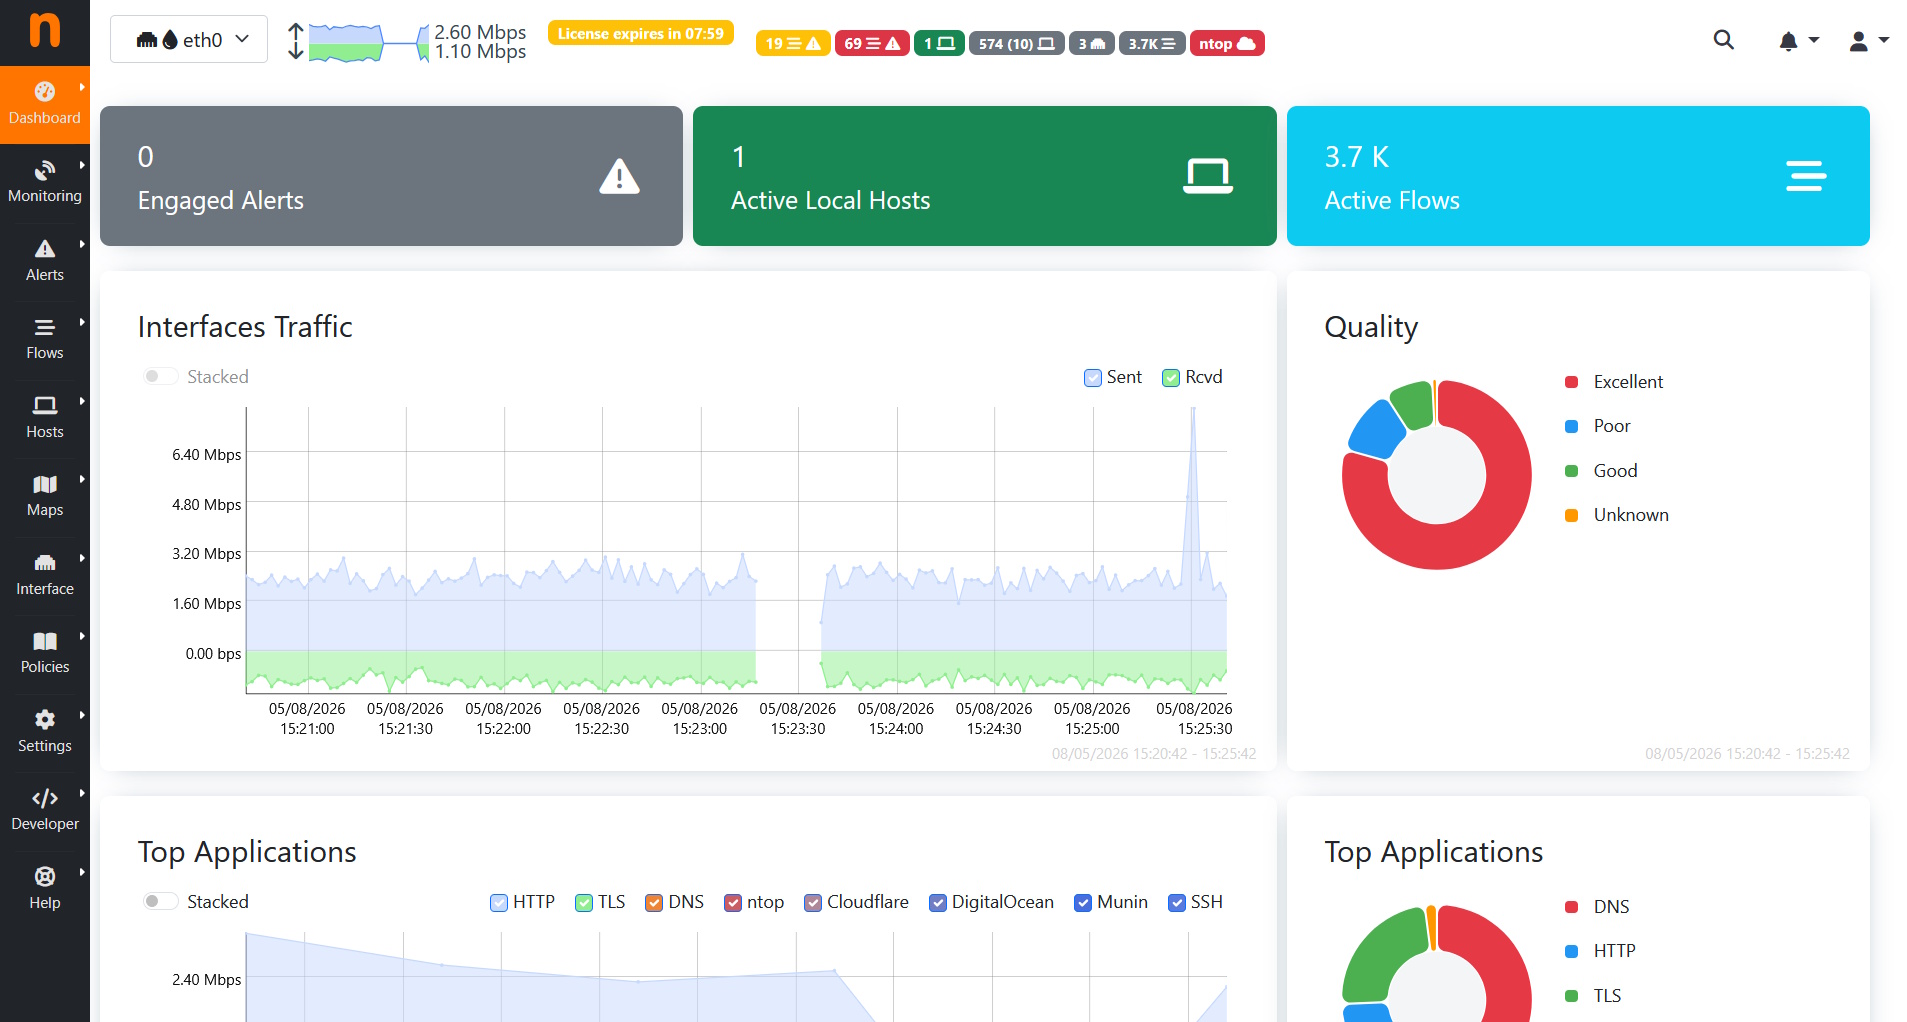
Once logged in, you should see the dashboard like below.
View the geolocation and ASN data #
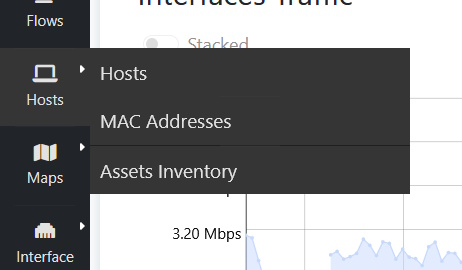
In the left-hand side menu, hover your mouse over Hosts and then click on Hosts in the sub-menu.
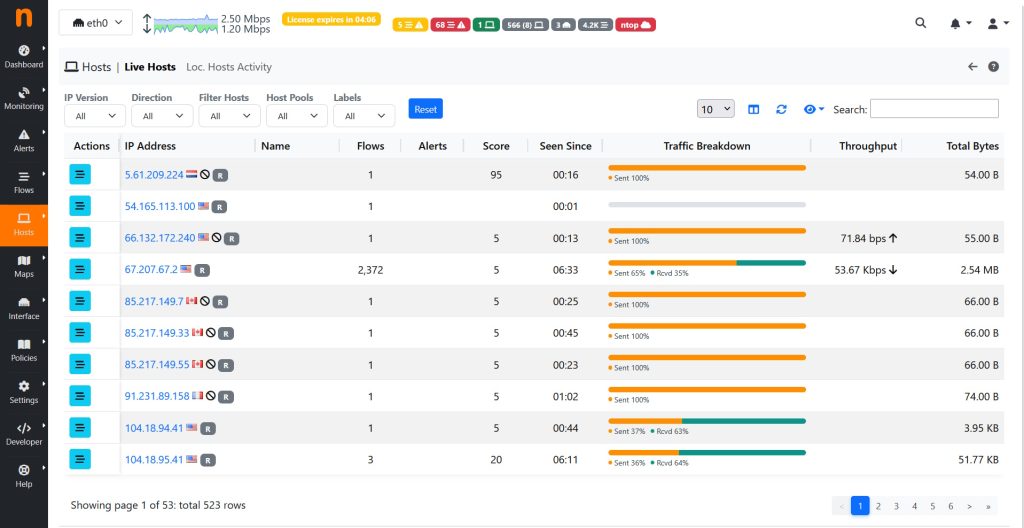
You should now see the below. Look closely and you’ll see country flags next to the IP addresses. That’s your geolocation data at work.
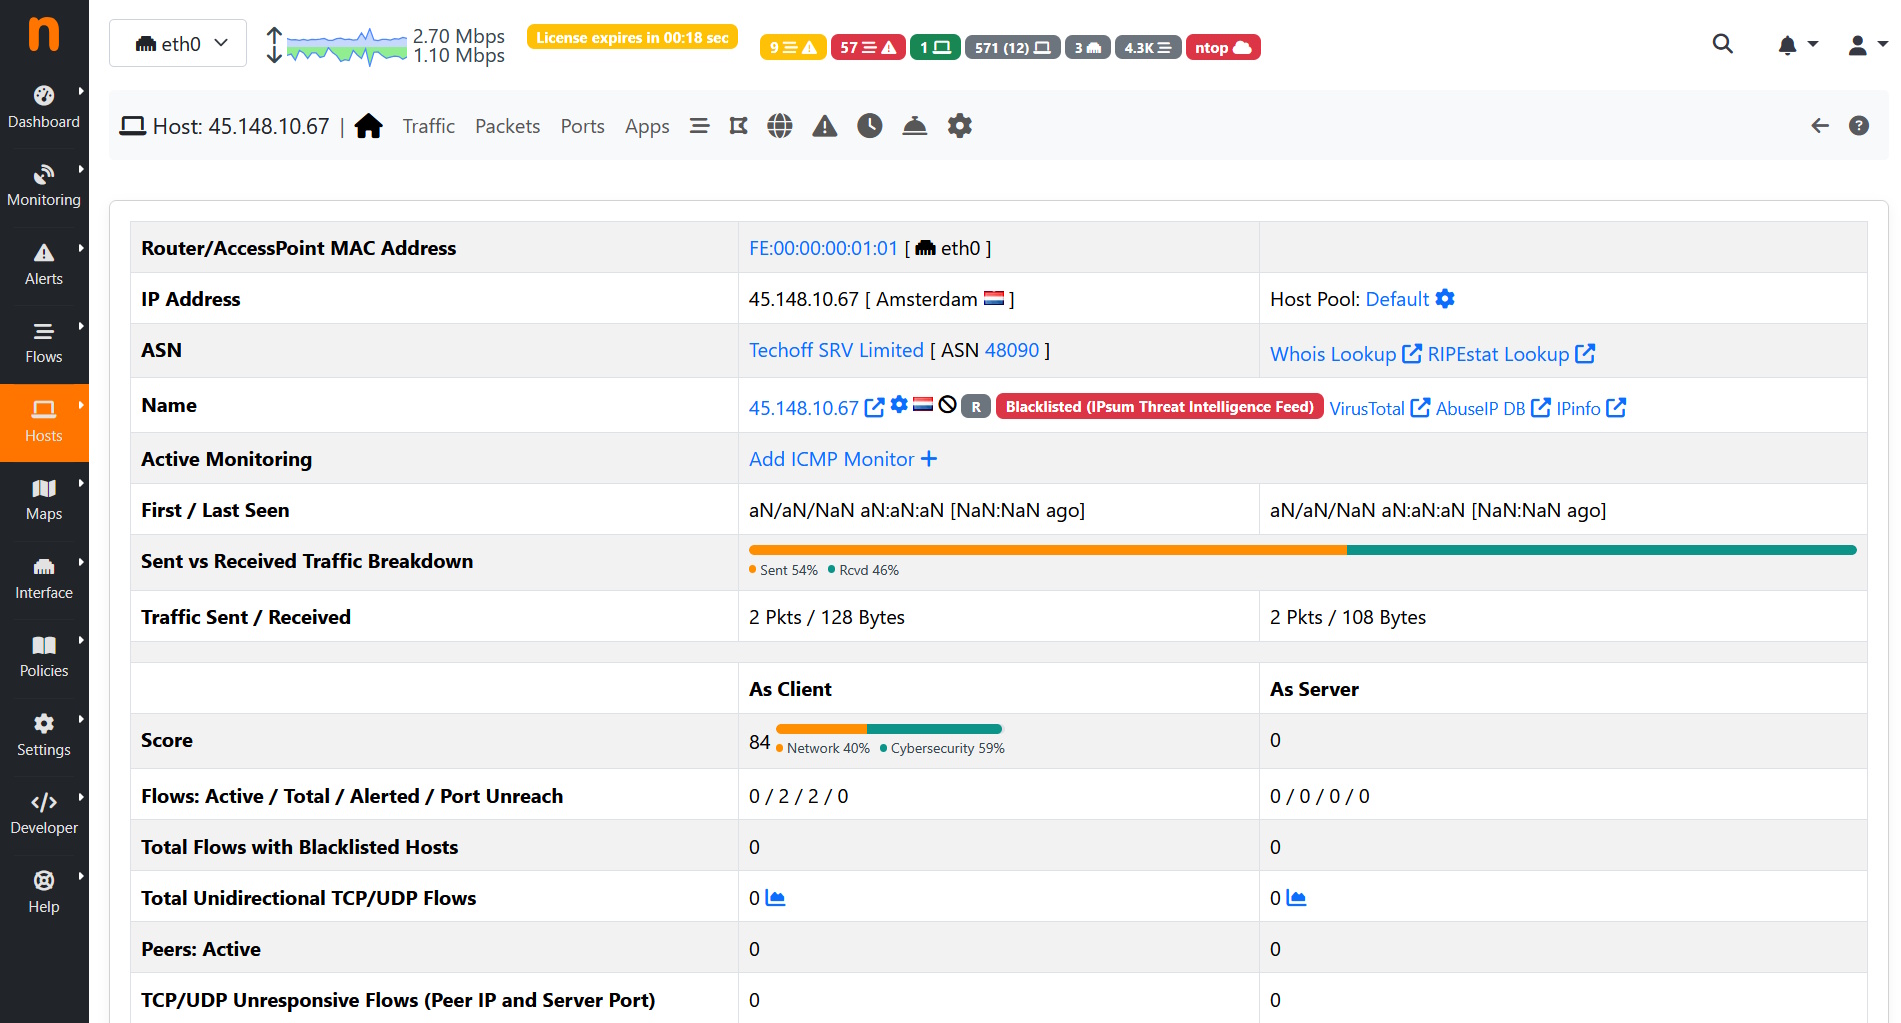
Click on any of the IP addresses and you’ll get to see more details about the IP address. There is the city where the IP address originates from and also the ASN details for the network side.
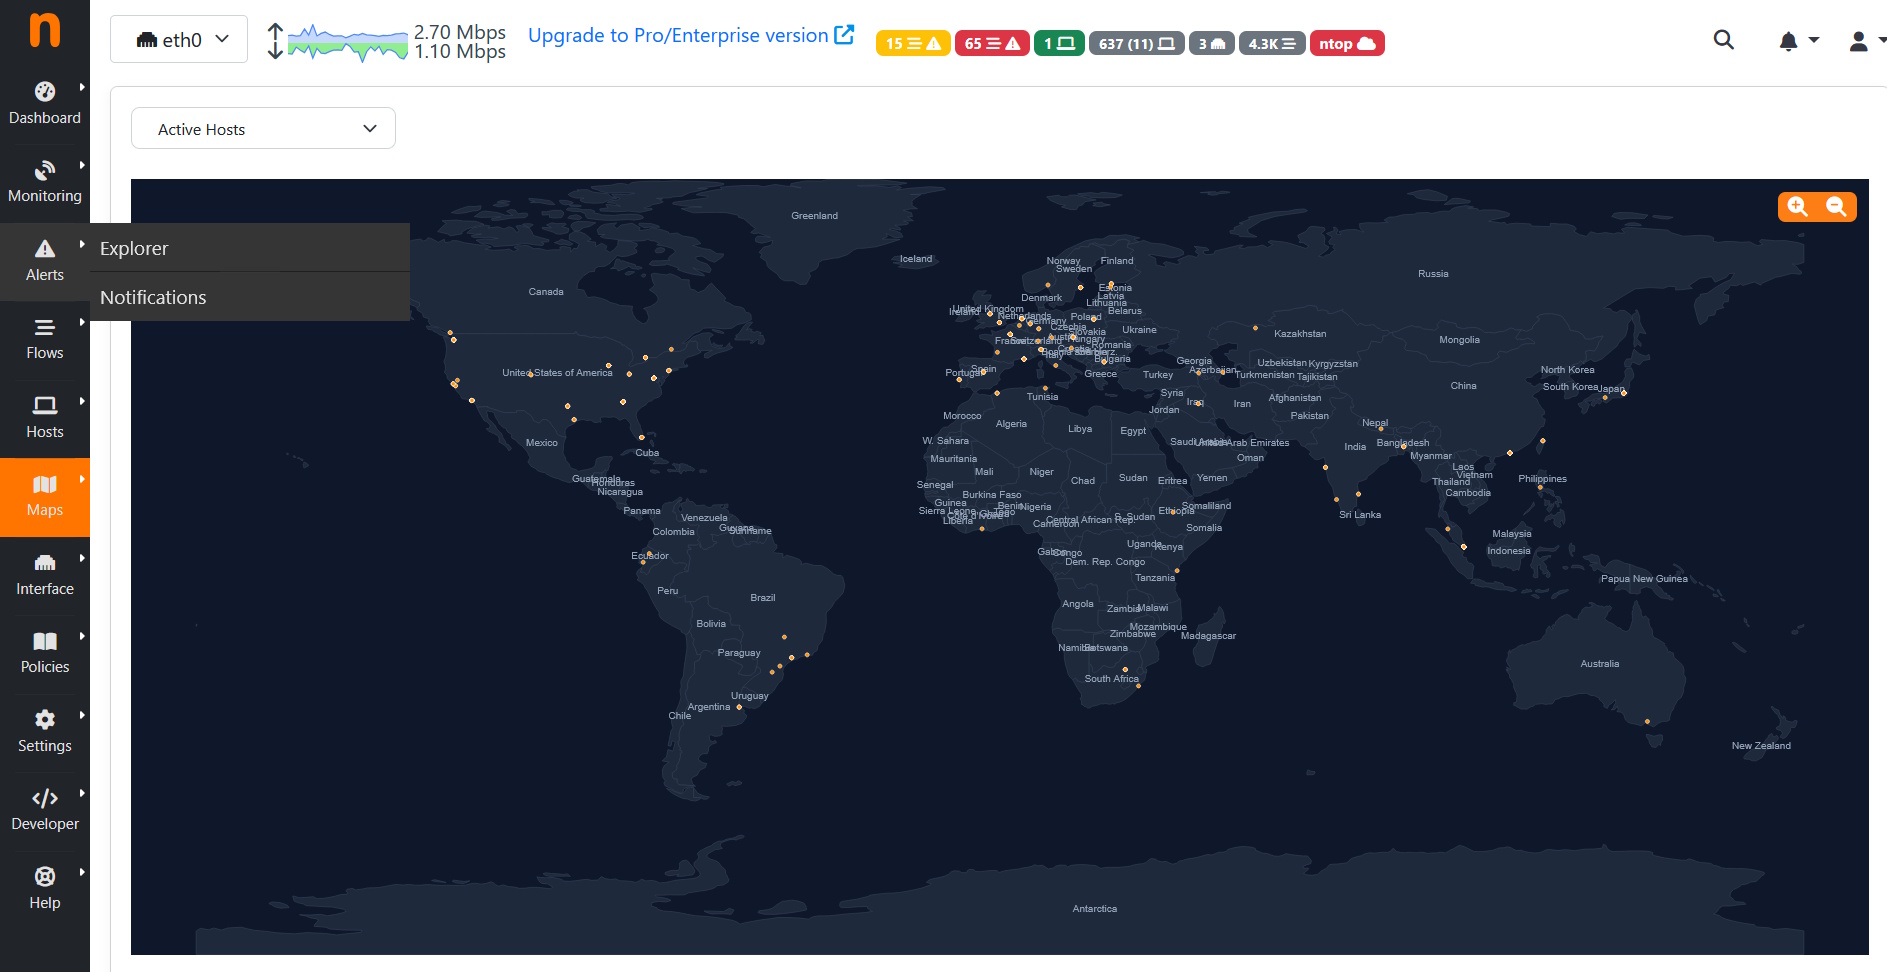
View the map of all geolocated IP address locations #
For a quick overview of the geolocations, you can hover your mouse over Maps in the left-hand side menu then click on Geo Map to see a map with locations plotted on it.
Conclusion #
Hope you found this simple guide handy for rapidly deploying ntopng to provide a useful monitoring tool to keep an eye on your server traffic. Coupled with the IP2Location LITE DB9 and ASN MMDB databases, it helps you to quickly see if any anomalous traffic appears on your site. Do note that the IP2Location LITE DB9 may not be as accurate as the paid version so if you wish to get the best accuracy, you can subscribe to the commercial DB9.


