

Introduction
n8n is a secure, AI-driven workflow automation tool designed for technical professionals. You can easily gather data from different services in n8n by using different integrations available. One of the key feature that make it stand apart of other automation platform such as Zapier and Make, is that they provided a self-hosting option. This provides an option for those users with enough development knowledge if they wish to migrate n8n into their system. In n8n, integrations are called nodes. The nodes served based on the requirement of the users, and had two types in general.
n8n had a collection of built-in integrations that are aimed at helping users to get started on their automation easily. In addition, n8n also supports the installations of nodes created by third party or the community. These so-called community nodes exist to provide additional features that the native integrations lack. However, sometimes you will find that a service that you want to use may still not available in n8n. For example, you want to use the IP2WHOIS API in n8n, but you can’t find any node that is developed for this API. You may wonder what options do you have. Well, you can find out in the next paragraph.
In this article, we will show you how to use the IP2WHOIS API in n8n. We will demonstrate how to fetch the domain name from an external source (Airtable in this article), query the IP2WHOIS API to get WHOIS data and update the source with the new data.
Prerequisite
Before we start, please make sure that you have either registered with the n8n cloud for the free trial or paid account, or installed n8n in your server. For more information on installing n8n in your server, kindly refer to their documentation.
This tutorial also requires you to have an IP2WHOIS API key. You can sign up for a free API key if you don’t have one.
Steps to use IP2WHOIS API in the n8n workflow
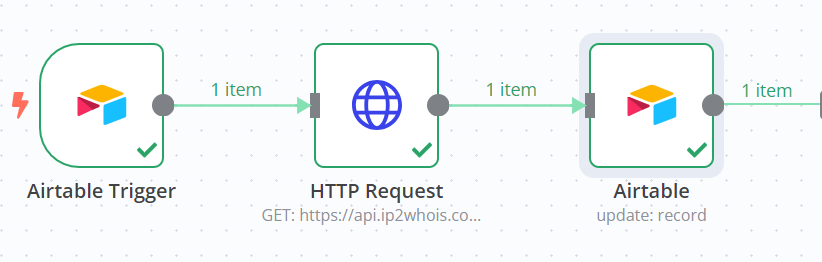
We will demonstrate how to lookup for WHOIS information based on an email address stored in Airtable using IP2WHOIS API, and then update the result back to Airtable.
- Login to your n8n dashboard, and go to the Workflows.
- Create a new workflow by clicking on the “Add workflow” button.
Step1- Add Airtable Trigger
We will need to use Airtable to retrieve the email address.
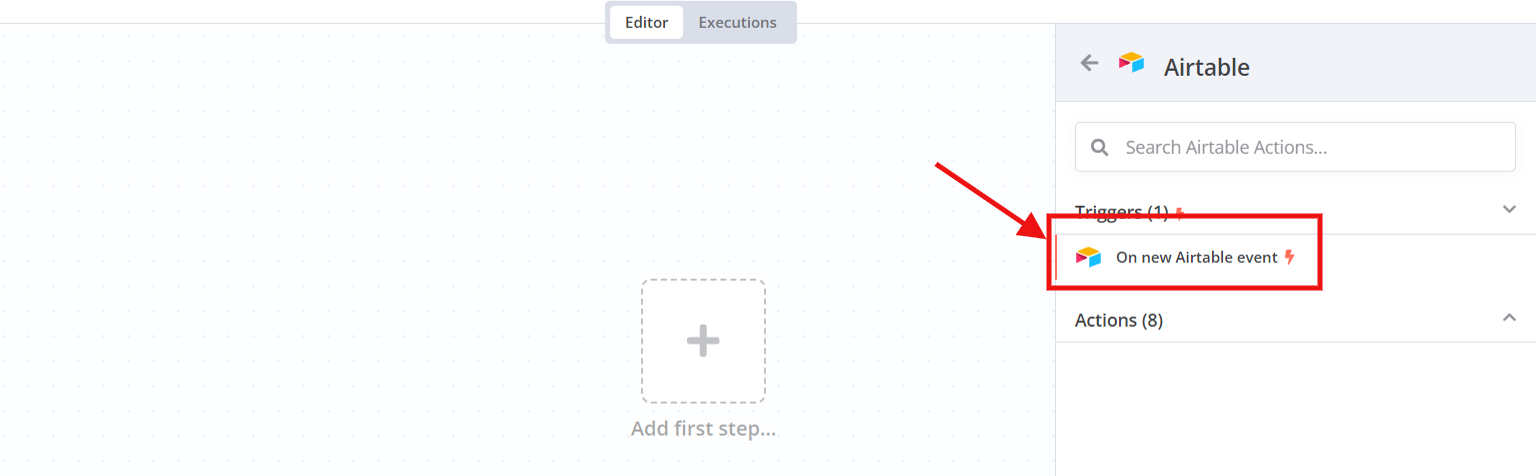
- Click on the “+” sign in the “Add first step…” box. Type Airtable and click on “Airtable” when it appears. After that, click on “On new Airtable event“.
- A pop up box that contains the configuration of the trigger will show up. You will first need to configure your Airtable account credential. If you haven’t configured it before, click on the “ – Create New Credential – ” to add one. Kindly visit their documentation to learn how to setup the credential.
- After that, you will need to select the table that you wish to import to. First of all, you will need to go to the table in your Airtable base and copy the URL of the table.
- Then, go back to n8n, and you will see there are two fields named Base and Table. Each field had a dropdown list and a input box. In the dropdown list, make sure you have selected the By URL option. Paste the URL you’ve copied just now into the input box for both fields. You will also be required to fill up the Trigger Field. Fill in the column name that have the field type of either Created time or Last modified time.
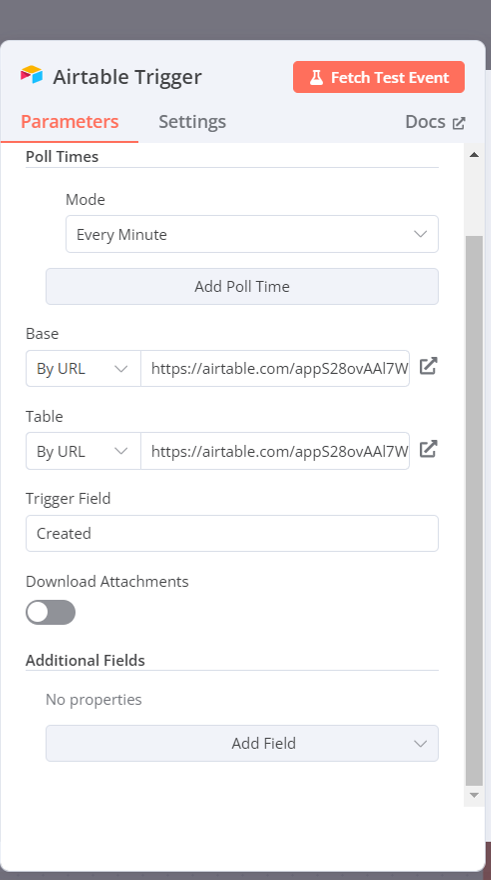
- After that, you can click on the “Fetch Test Event” button to test if the trigger is able to get the data or not. You will see the data of the table showed up at the “OUTPUT” panel at the right side if successful. Click on “Back to canvas” when done.
Step 2 – Add HTTP Request
We will need to use the “HTTP Request” core node to perform a query to the IP2WHOIS API using the data extracted from the table.
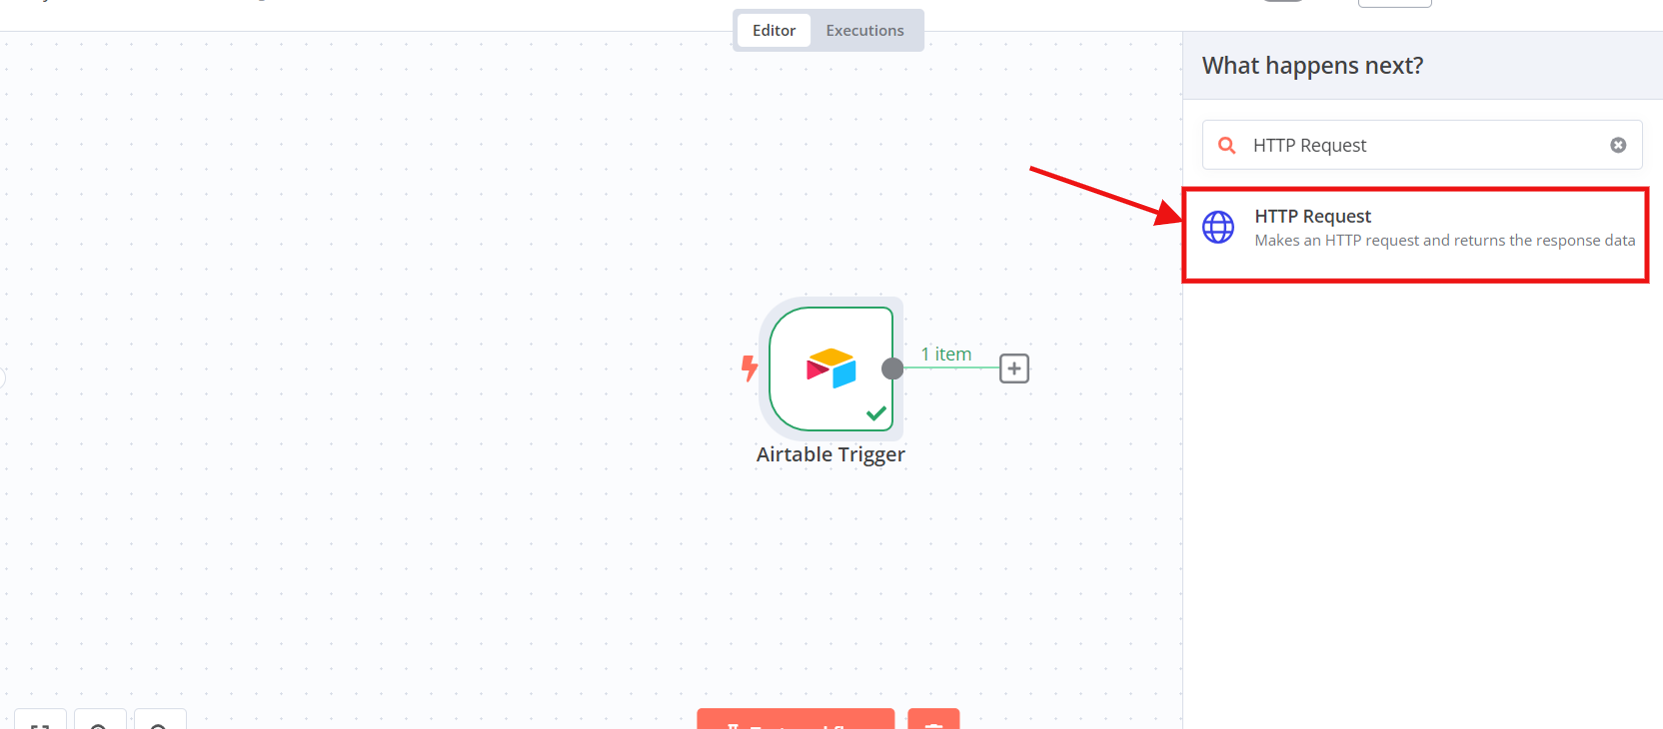
- Click on the + sign near “Airtable Trigger“, and search for “HTTP Request” in the search box. Click on it when it appears.
- In the configuration box, make sure the method is set to “GET“. In the “URL” field, copy and paste the base API URL which is https://api.ip2whois.com/v2. In the “Authentication” field, click on the “Generic Credential Type” from the dropdown list. In the “Generic Auth Type” field, click on the “Query Auth” from the dropdown list.

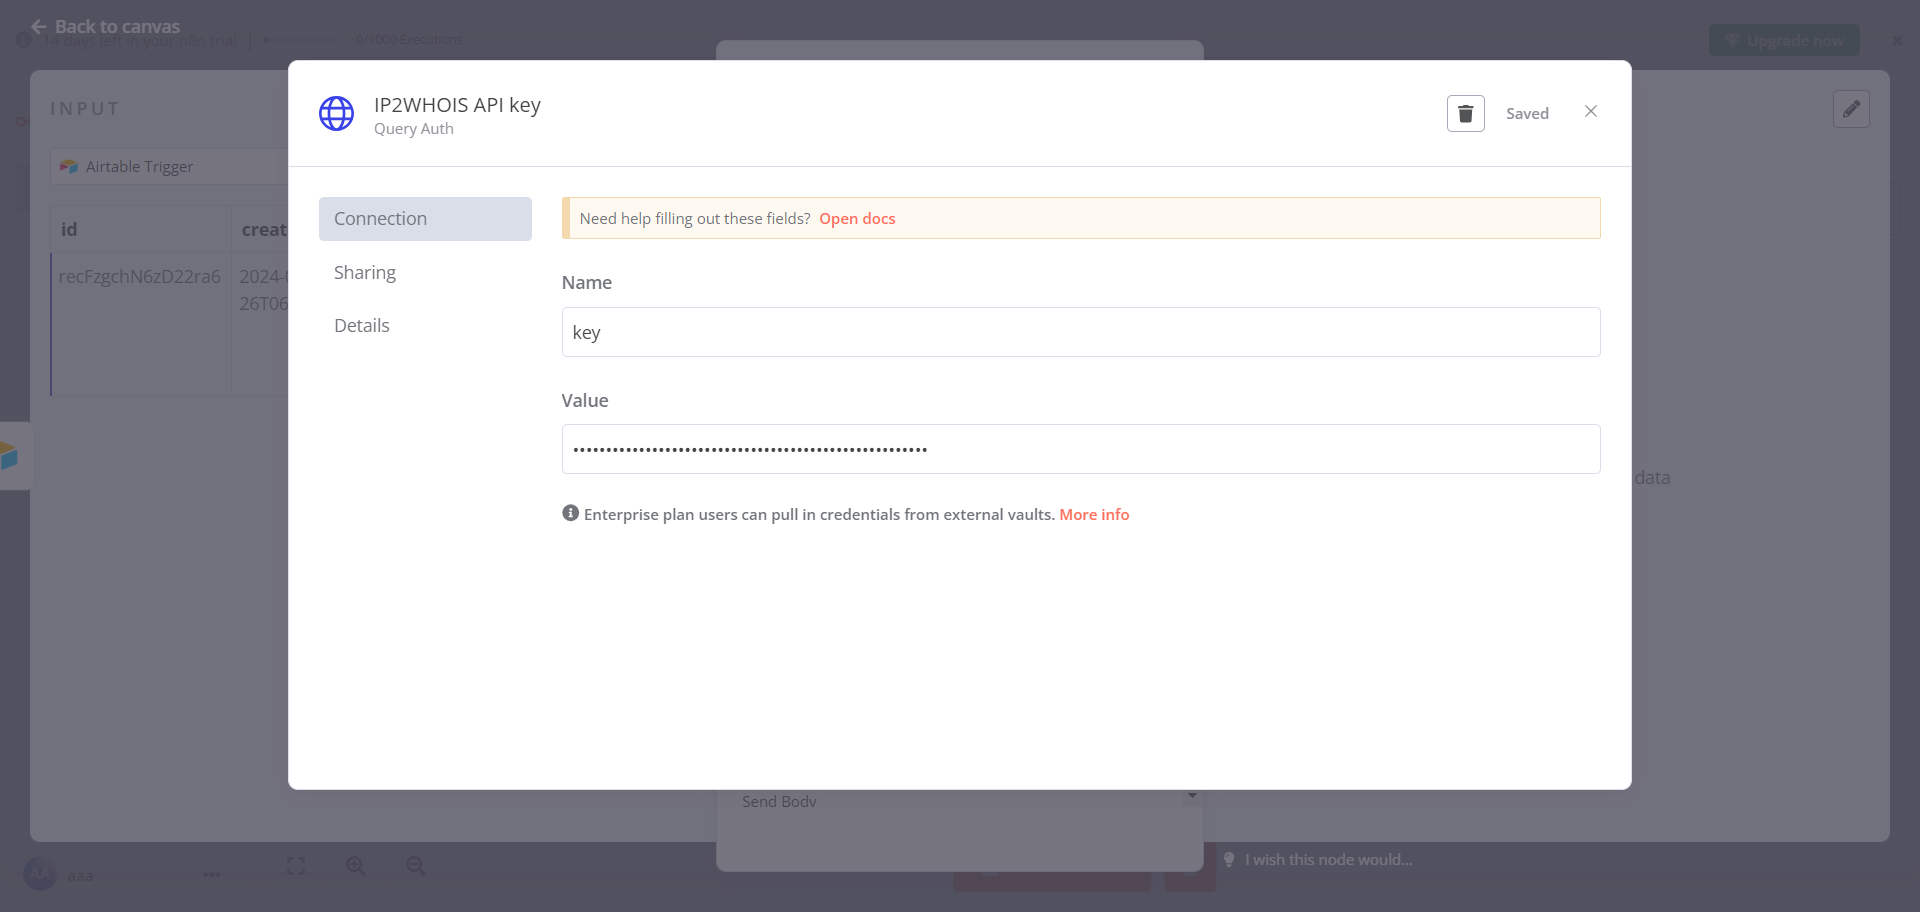
- Click on the “ – Create New Credential – ” if you haven’t saved your API key in n8n before. Change the “Query Auth account” on the top to “IP2WHOIS API key“. Then, key in “key” in the Name field and your API key obtained from the IP2Location.io account dashboard in the Value field. Click on the Save button once done.
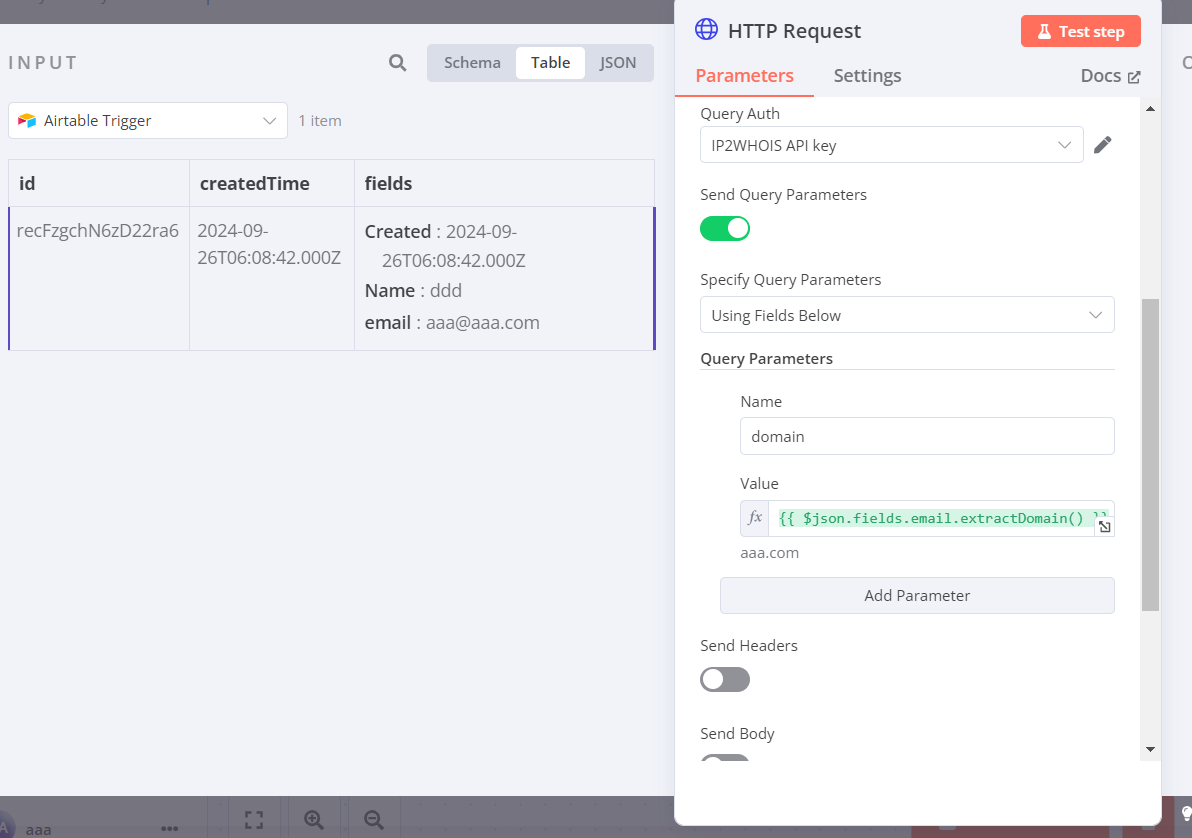
- Toggle on the “Send Query Parameters“. In the “Query Parameters” section, enter “domain” in the Name field and drag on the email address at the left hand side to the Value field. Click on the input box, and add a dot after the
json.fields.emailto open the formatting menu. Choose theextractDomain()from the menu.
- Click on the “Test step” to test the action. You will see the result appeared at the “Output” panel at right side if success. Click on the “Back to canvas” when done.
Step 3 – Export the result back to Airtable
Now, we will export the result back to the same table. Here, we will show how to export the value of registrant’s organization to the table.
- First of all, go back to the table in Airtable, and add a new column called “email_domain_owner” and set the field type to Single line text.
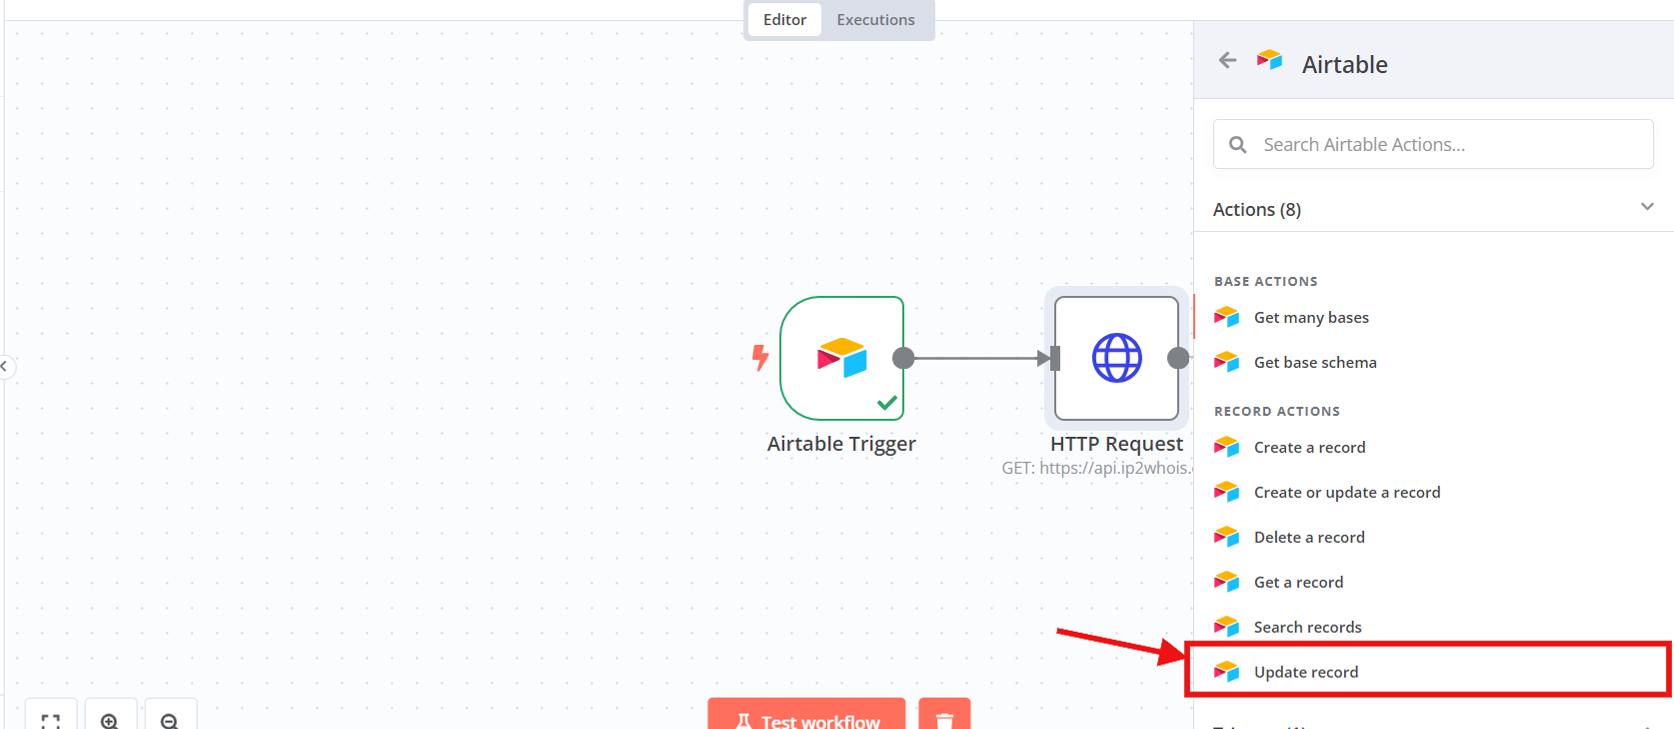
- Then, click on the + sign near the “HTTP Request“, and search for Airtable. Click on the Airtable, and then click on the Update record.
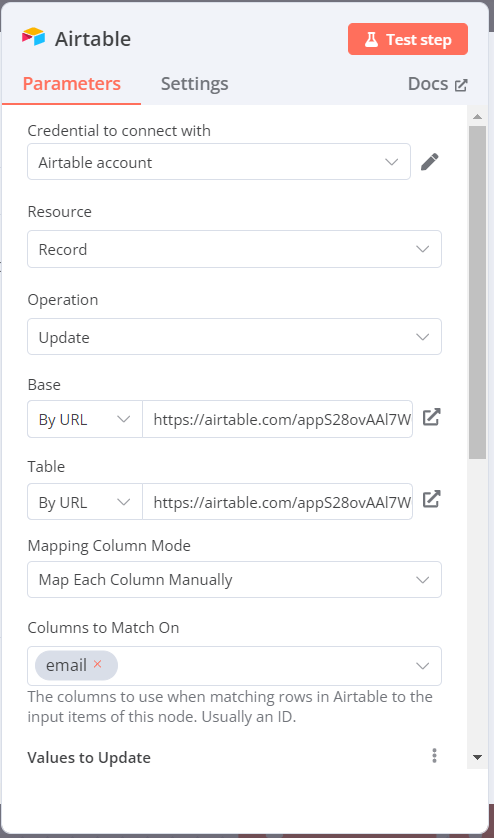
- Look for the Base and Table fields, change the dropdown menu value to By URL, and paste the table URL from your Airtable account. Then, in the Columns to Match On field, remove the predefined “id”, and from the dropdown list, click on the email column.
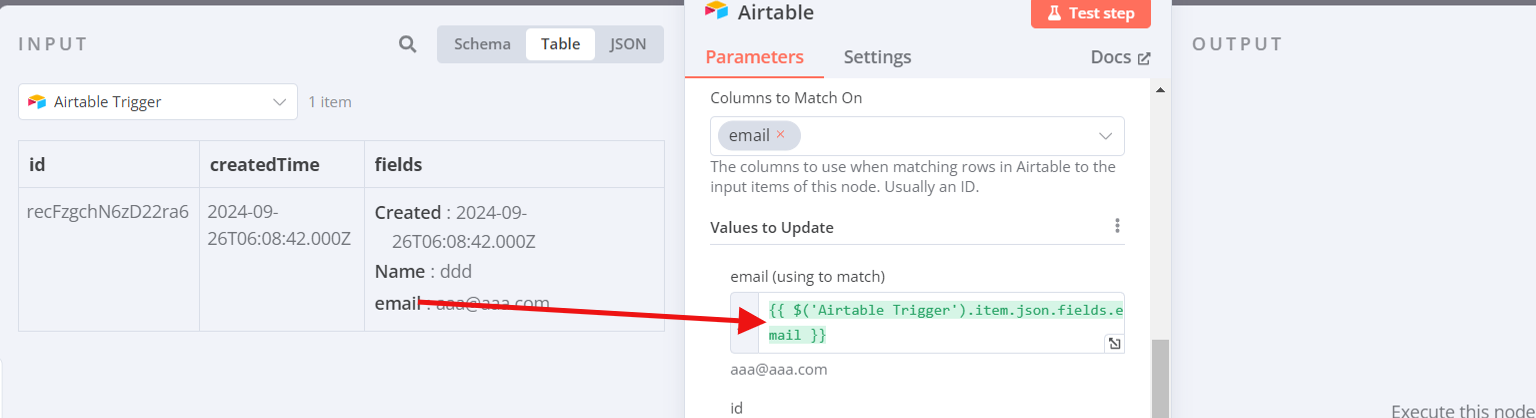
- In the Values to Update field, you will need to fill up the value used to match and the value to be updated. First, at the input at left side, click on the dropdown list and select the Airtable Trigger. Drag the email to the first field under the Values to Update field.
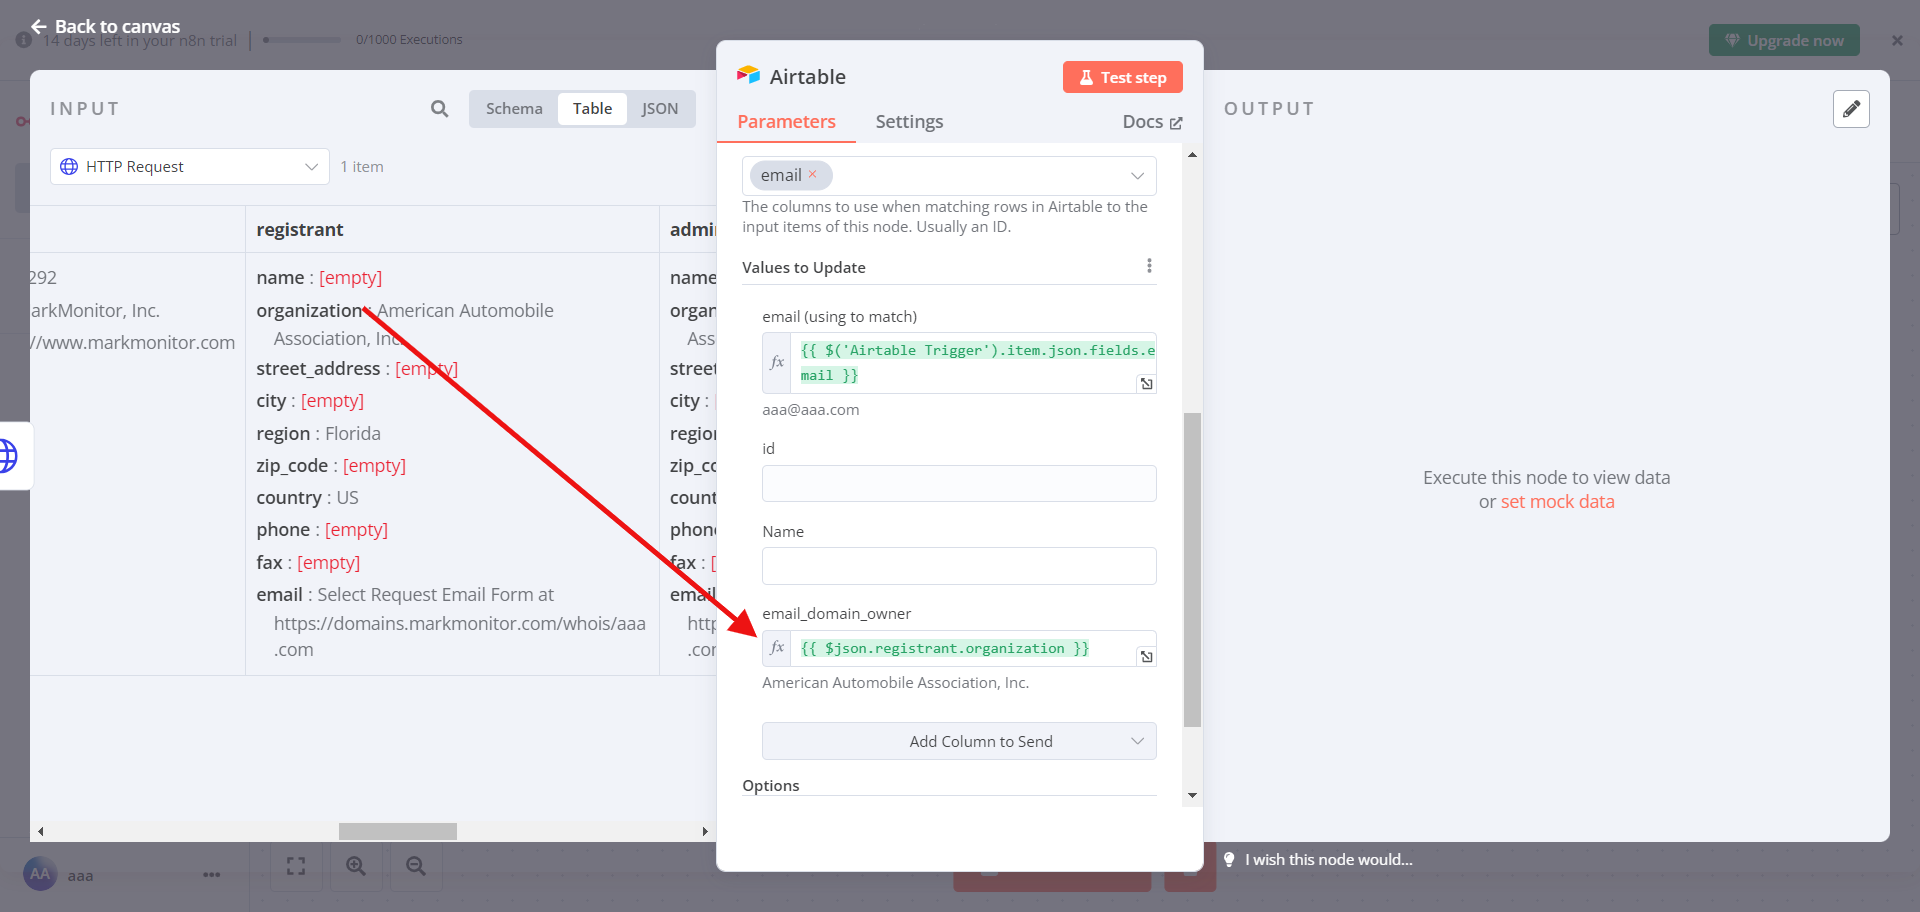
- After that, at the input at left side, click on the dropdown list and select the HTTP Request. Look for the registrant column, and drag the organization field to the email_domain_owner field.
- Click on the “Test step” to test the action. You will see the result appeared at the “Output” panel at right side if success. Click on the “Back to canvas” when done.
Conclusion
n conclusion, n8n is a powerful tool to help you with automating the tasks of workflows. There are more services that you can integrate with n8n and IP2WHOIS API service other than Airtable.
THE POWER OF IP GEOLOCATION API
Find a solution that help in your business.