
Intro #
Wireshark is a powerful, open-source network protocol analyzer used to capture and inspect data traveling through a network in real time. It’s commonly used by network administrators, security professionals, developers, and IT engineers for tasks such as network troubleshooting and security analysis. With the newly released IP2Location MMDB, users can now enhance their network traffic analysis by integrating IP geolocation data directly within Wireshark.
One useful feature that is beneficial for troubleshooting and analysis is the ability to get geolocation data for the IP addresses found in the network packets. Wireshark does this by querying MaxMind’s GeoIP2 or GeoLite2 databases which comes in the MMDB format. This format was created for fast IP address lookups.
IP2Location now includes MMDB format #
Now, users of the IP2Location’s geolocation databases have the ability to download data in the MMDB format so they can easily use IP2Location’s data within Wireshark. There are 3 MMDB files supplied by IP2Location that corresponds to the equivalent MaxMind files. They are the LITE DB1 (equivalent of GeoLite2 Country), LITE DB9 (equivalent of GeoLite2 City) and LITE ASN (equivalent of GeoLite2 ASN). For this article, we’ll focus on the free IP2Location LITE DB9 & ASN MMDB databases to show how to query geolocation data within Wireshark.
Installing Wireshark #
In order to follow our guide below, you will need to install Wireshark for your operating system. For our demo, we’ll be using Windows 11, hence we’ll install the relevant Wireshark version. You can refer to https://www.wireshark.org/download.html for the version that you need to download and install.
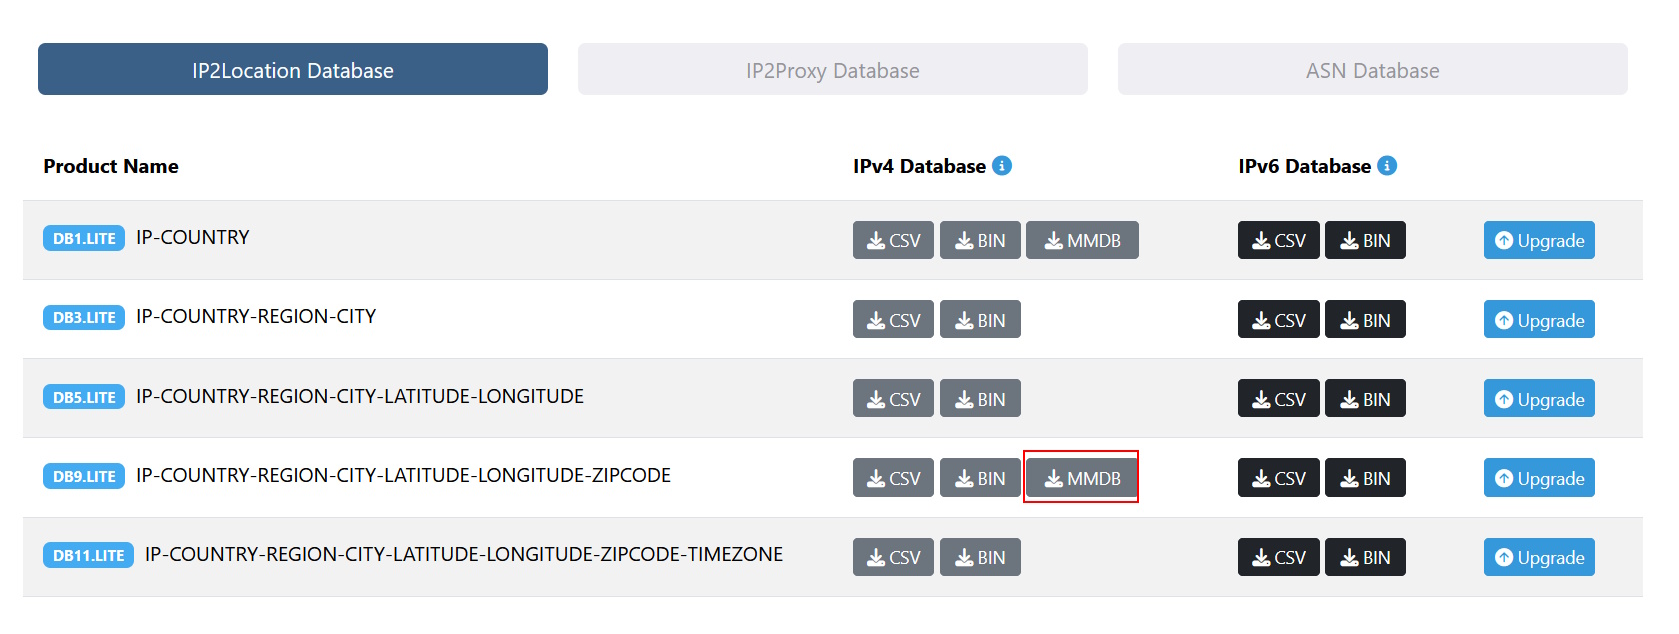
Download the IP2Location LITE DB9 & ASN MMDB databases #
Now, we need to download the IP2Location LITE DB9 & ASN MMDB databases so we can perform city-level geolocation & ASN queries inside Wireshark. You can sign up and download the free LITE DB9 & ASN MMDB files from https://lite.ip2location.com/ip2location-lite.
Under the IP2Location Database tab, download the LITE DB9 MMDB file.
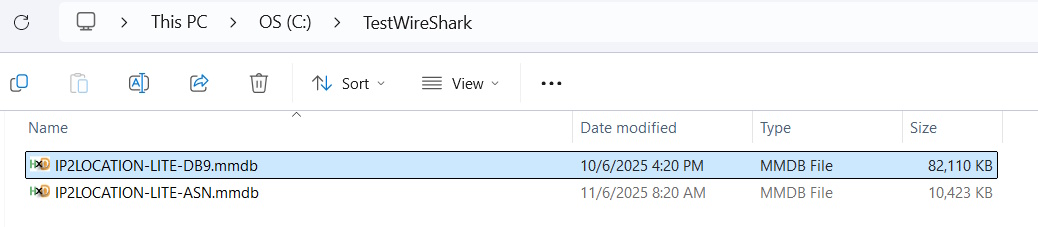
After downloading the zipped file, extract the IP2LOCATION-LITE-DB9.MMDB and store it in a folder called C:TestWireShark. Create the folder if it doesn’t exist.
Next, we’ll download the LITE ASN MMDB file under the ASN Database tab.

After downloading the zipped file, extract the IP2LOCATION-LITE-ASN.MMDB and store it in the same folder as above.
WARNING: You will need to rename both files so that the file extension is .mmdb instead of .MMDB as Wireshark will not be able to read the files if the file extension is in upper case.
Configure Wireshark to enable the IP geolocation feature #
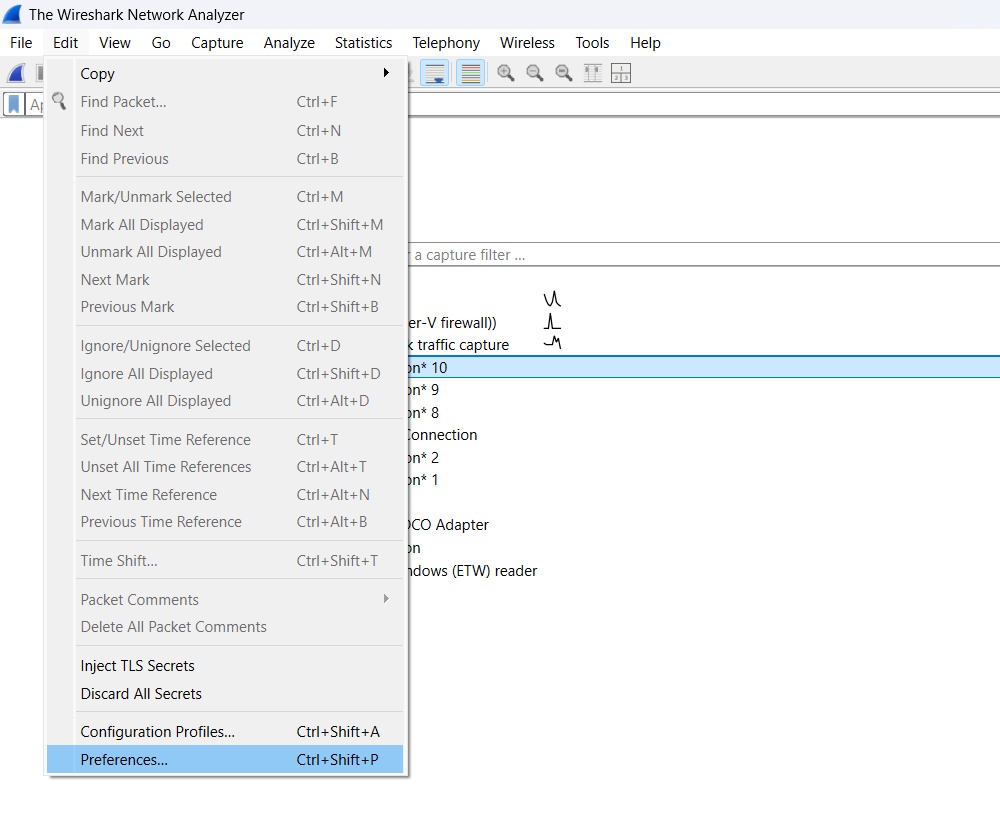
Launch Wireshark then in the menu bar, click on Edit -> Preferences.
Inside the Preferences, click on Name Resolution on the left-hand side. Then, click on Edit next to the MaxMind database directories.
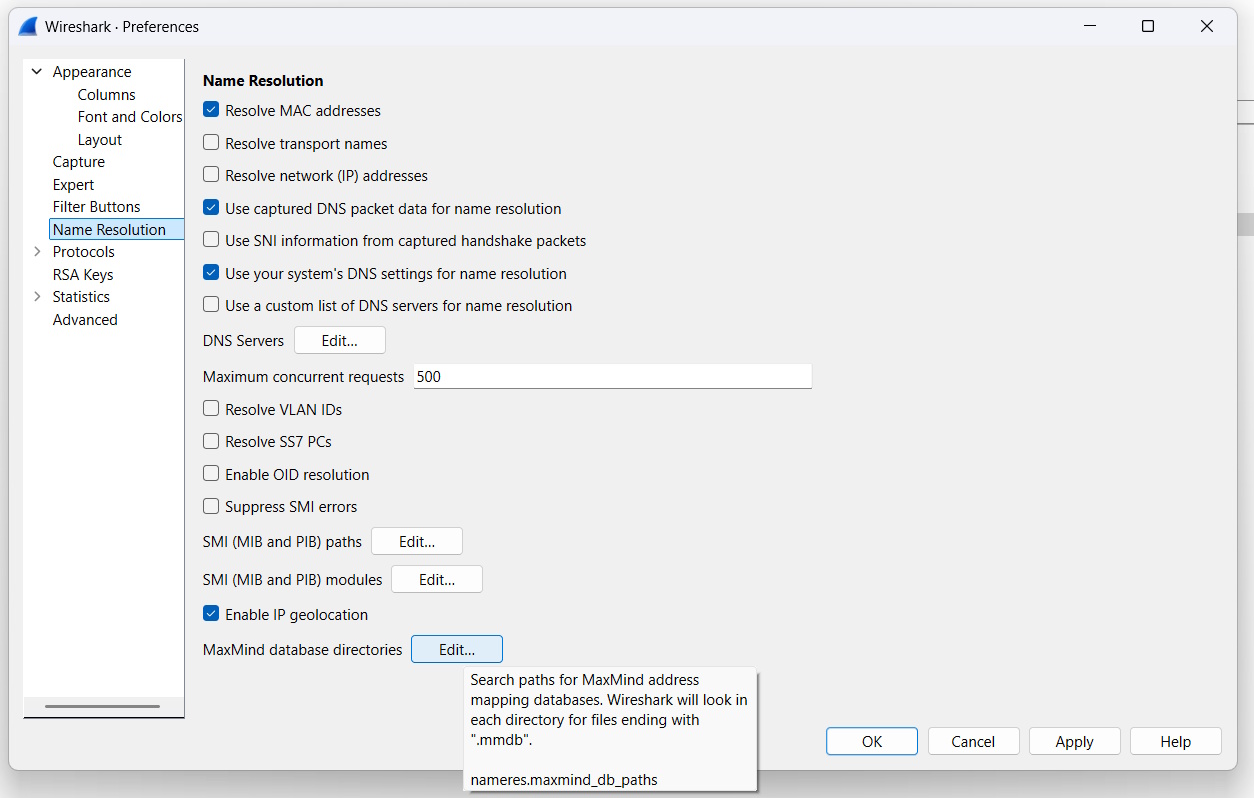
Add the path to our folder from above inside the MaxMind Database Paths. This is so that Wireshark knows where to look for the MMDB files to query.

Keep pressing OK until you are back in the main Wireshark window.
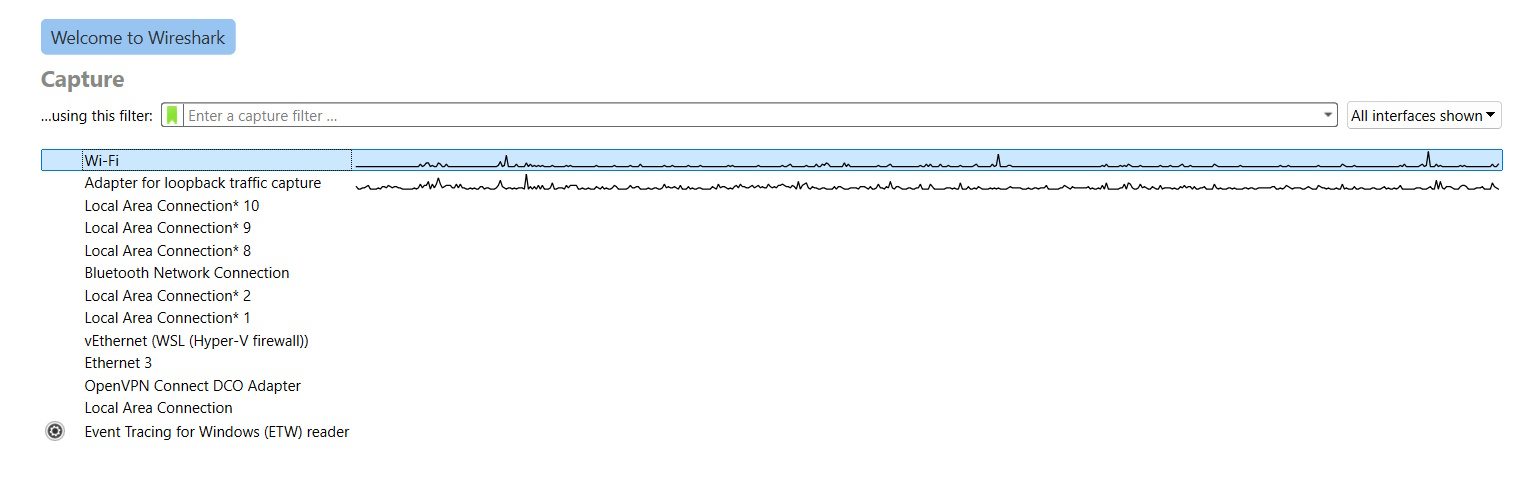
Choose which network adapter to capture traffic #
Double-click on the network adapter that you wish to capture traffic from. In our case, it is Wi-Fi.
It should start to capture network traffic like below from the Wi-Fi adapter.
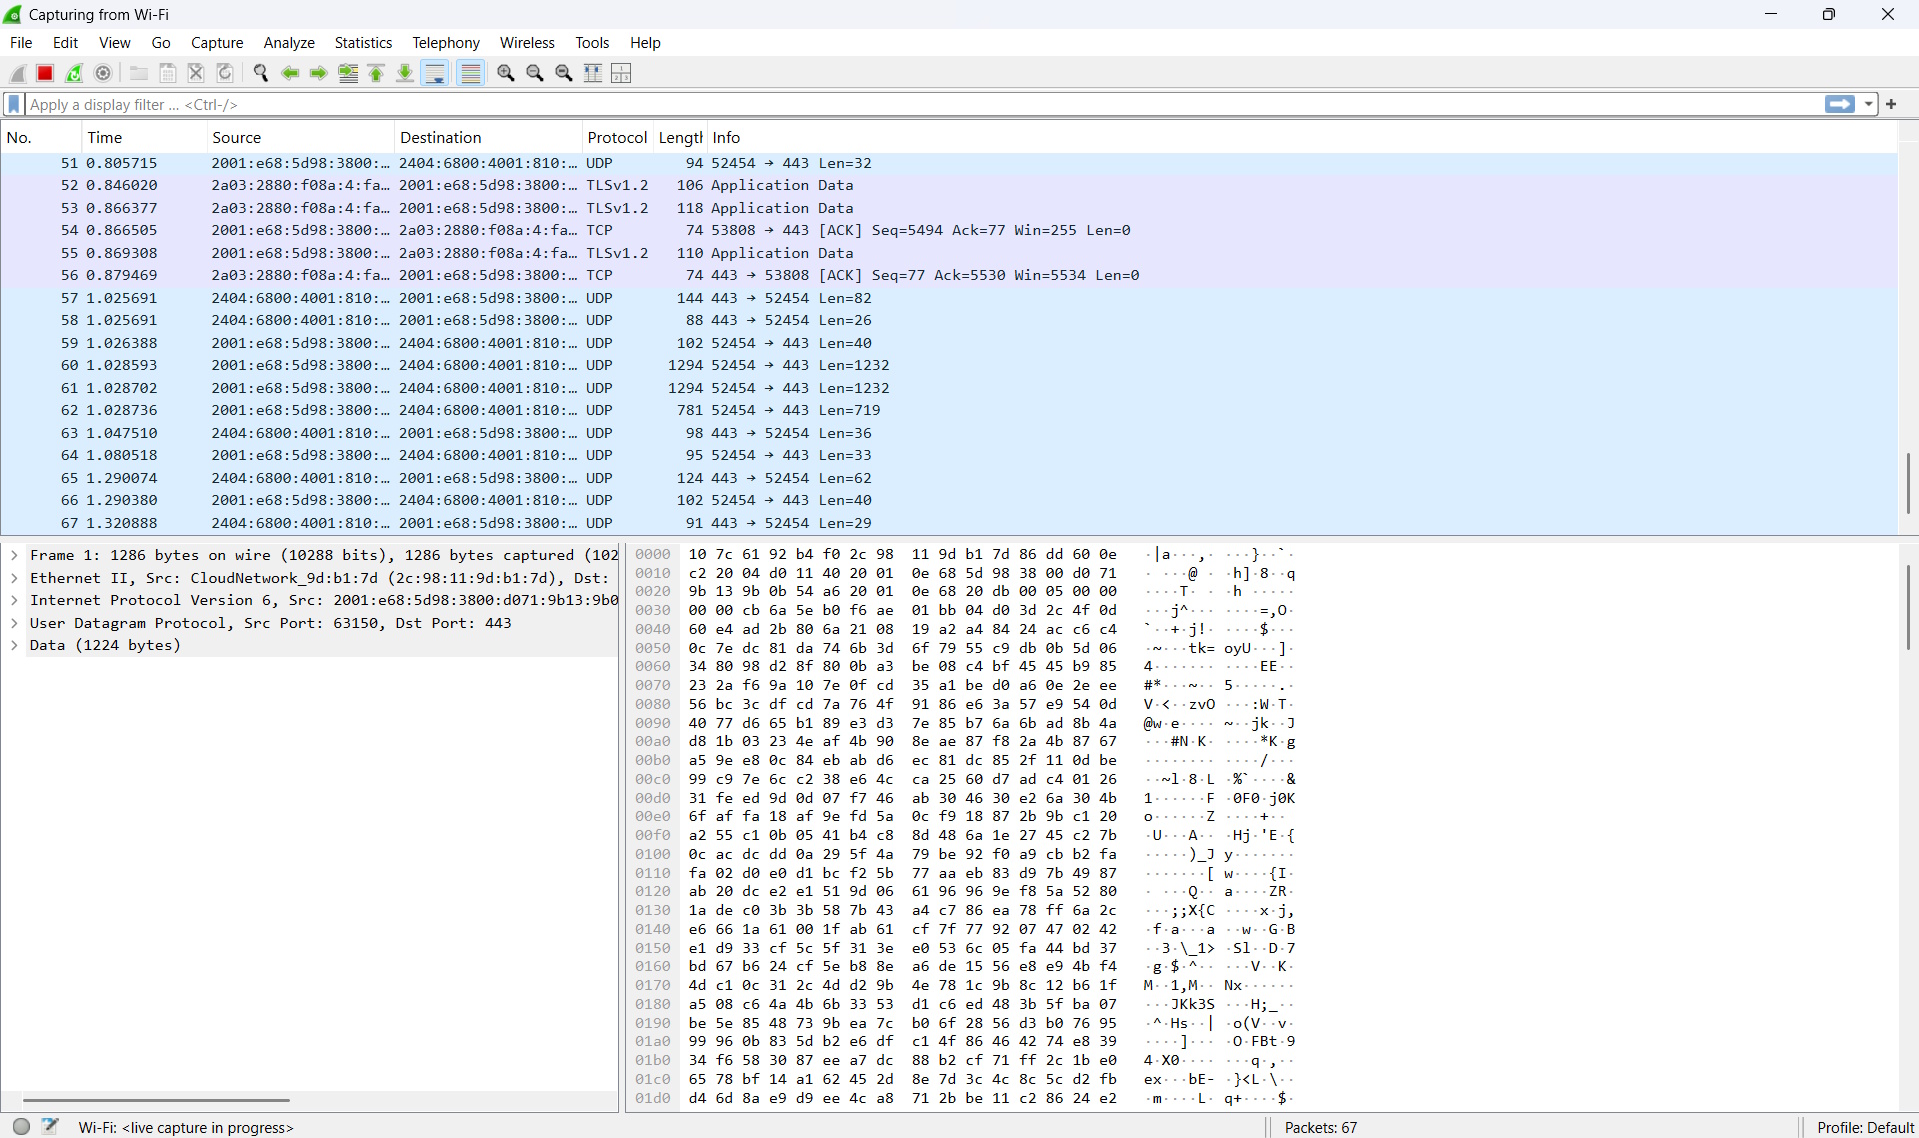
Let’s stop the data capture and analyse the data #
Once we’ve collected enough network traffic, press the Stop capturing packets button and take a closer look at the geolocation data for the IP addresses in the captured data. Click on one of the lines of traffic, then click on Internet Protocol Version 6 and you’ll see the below.
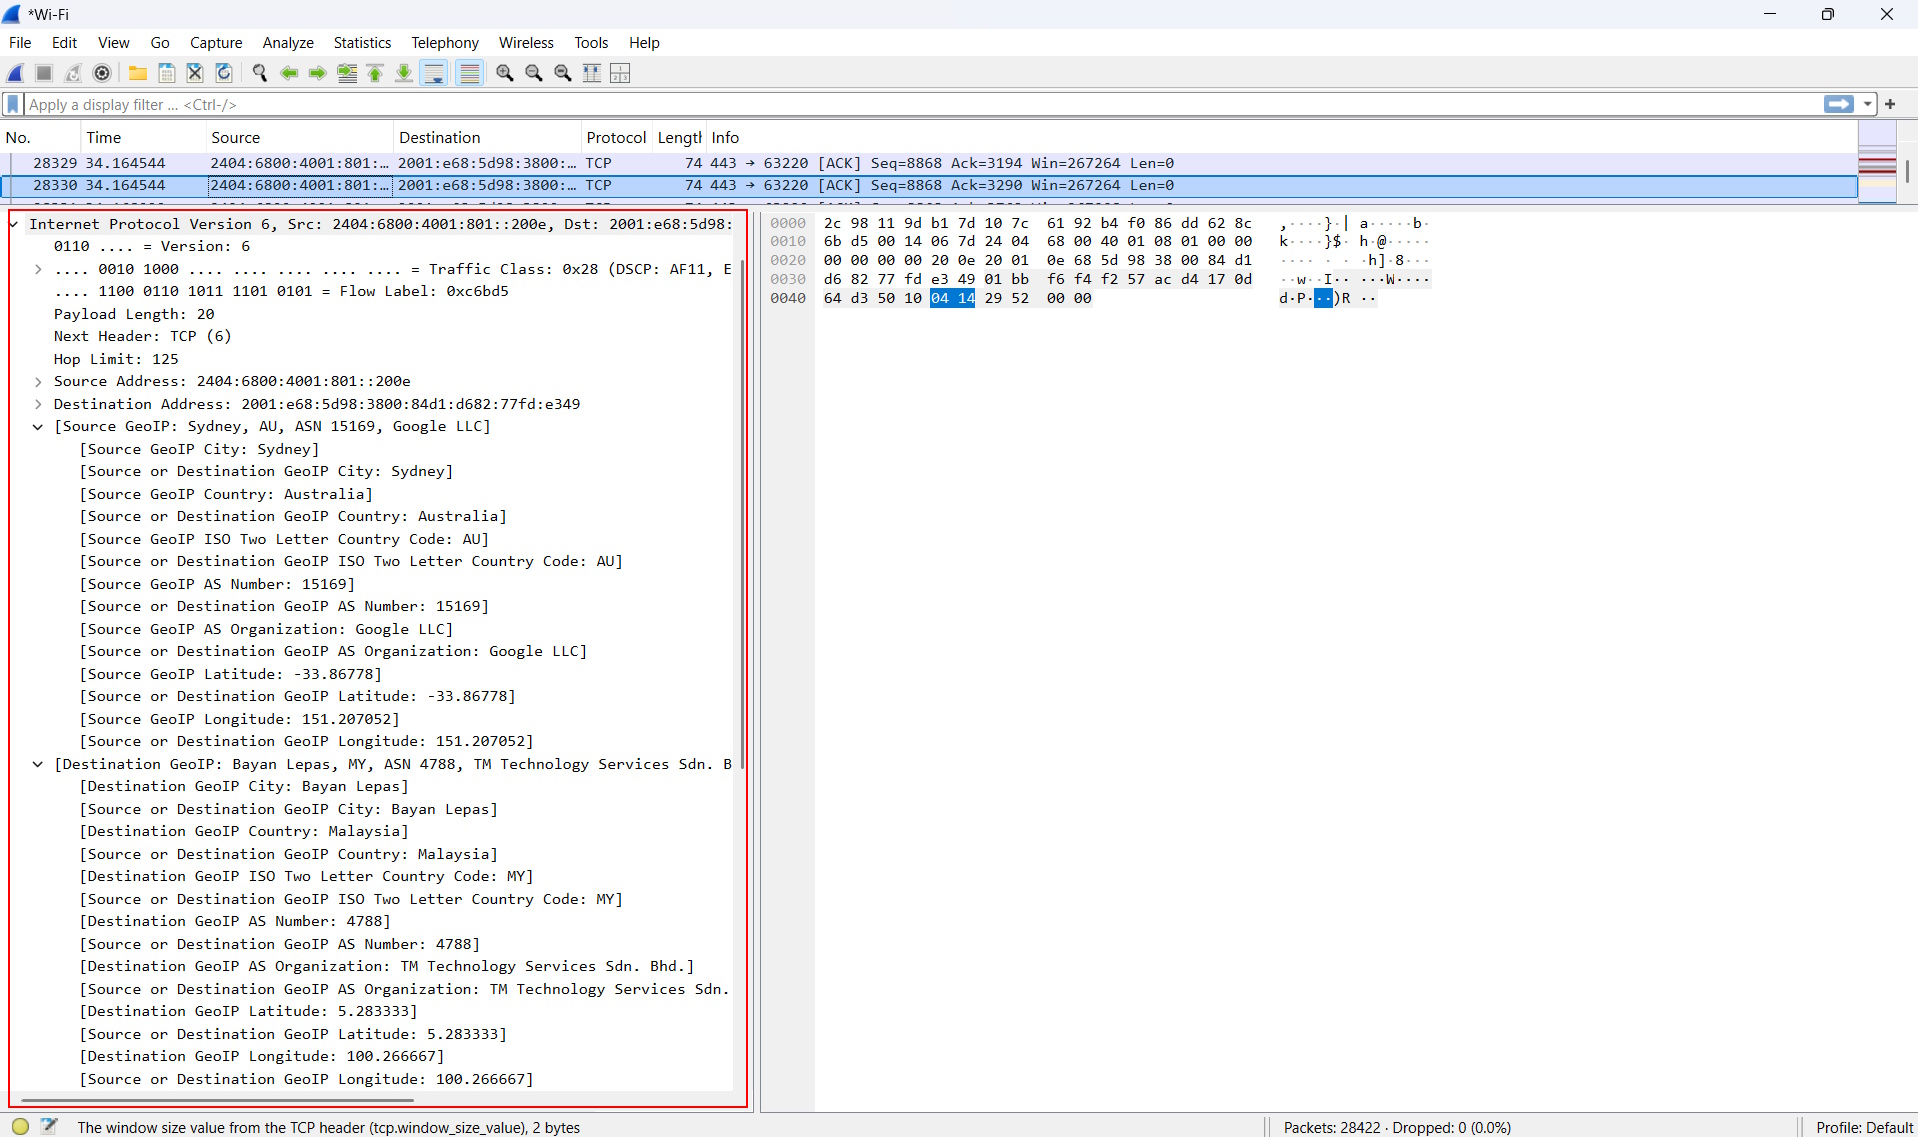
You can see that the source of the traffic is coming from Sydney in Australia while the Autonomous System (AS) shows that the IP belongs to Google. Meanwhile, you can see that the destination for the traffic is Bayan Lepas in Malaysia and the AS is telling us that the IP is from TM Technology Services.
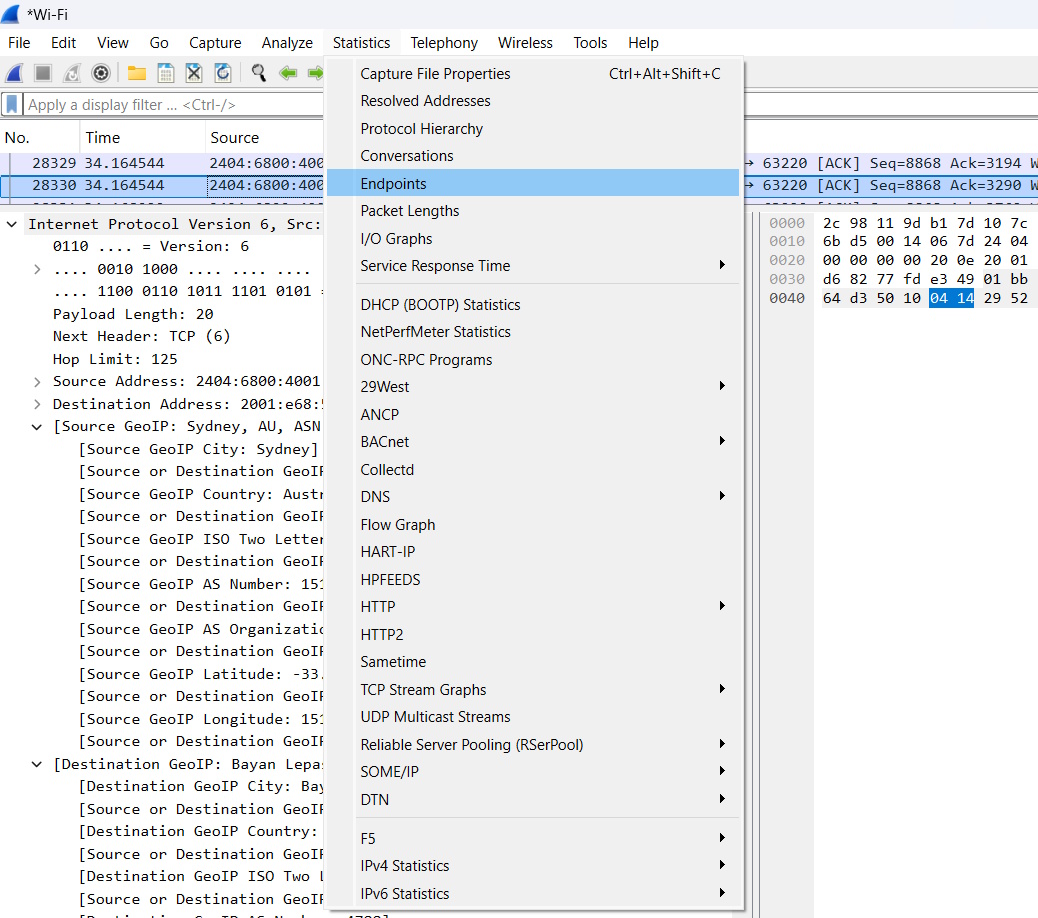
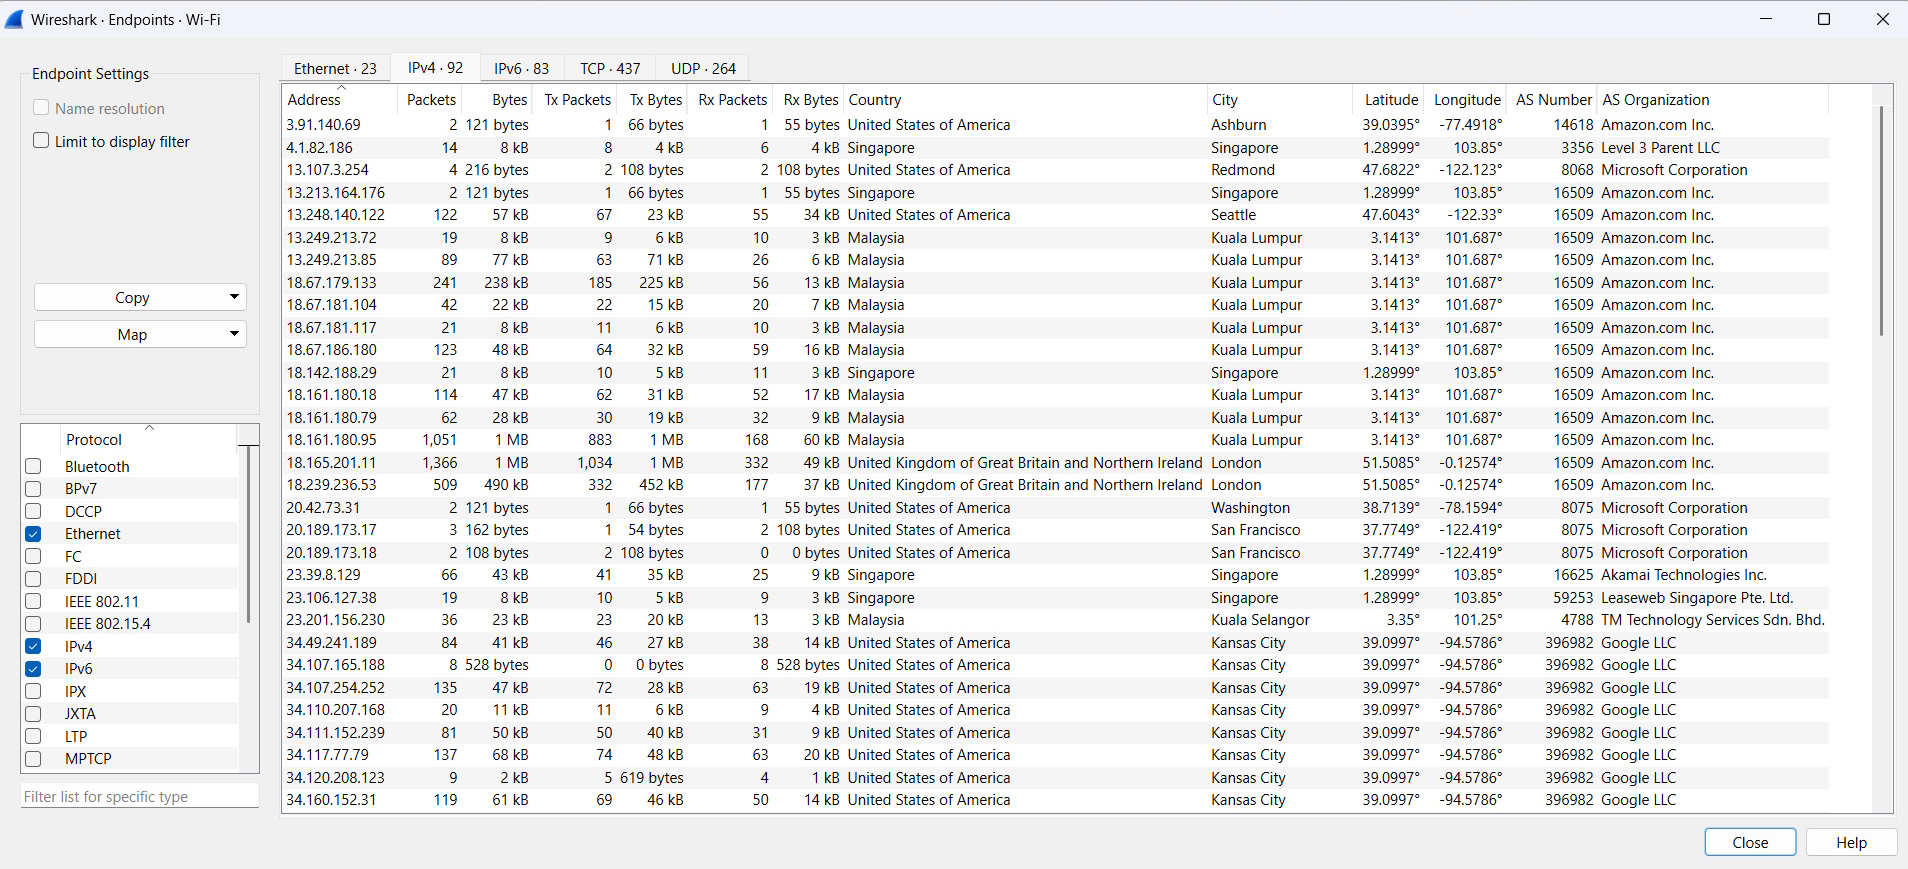
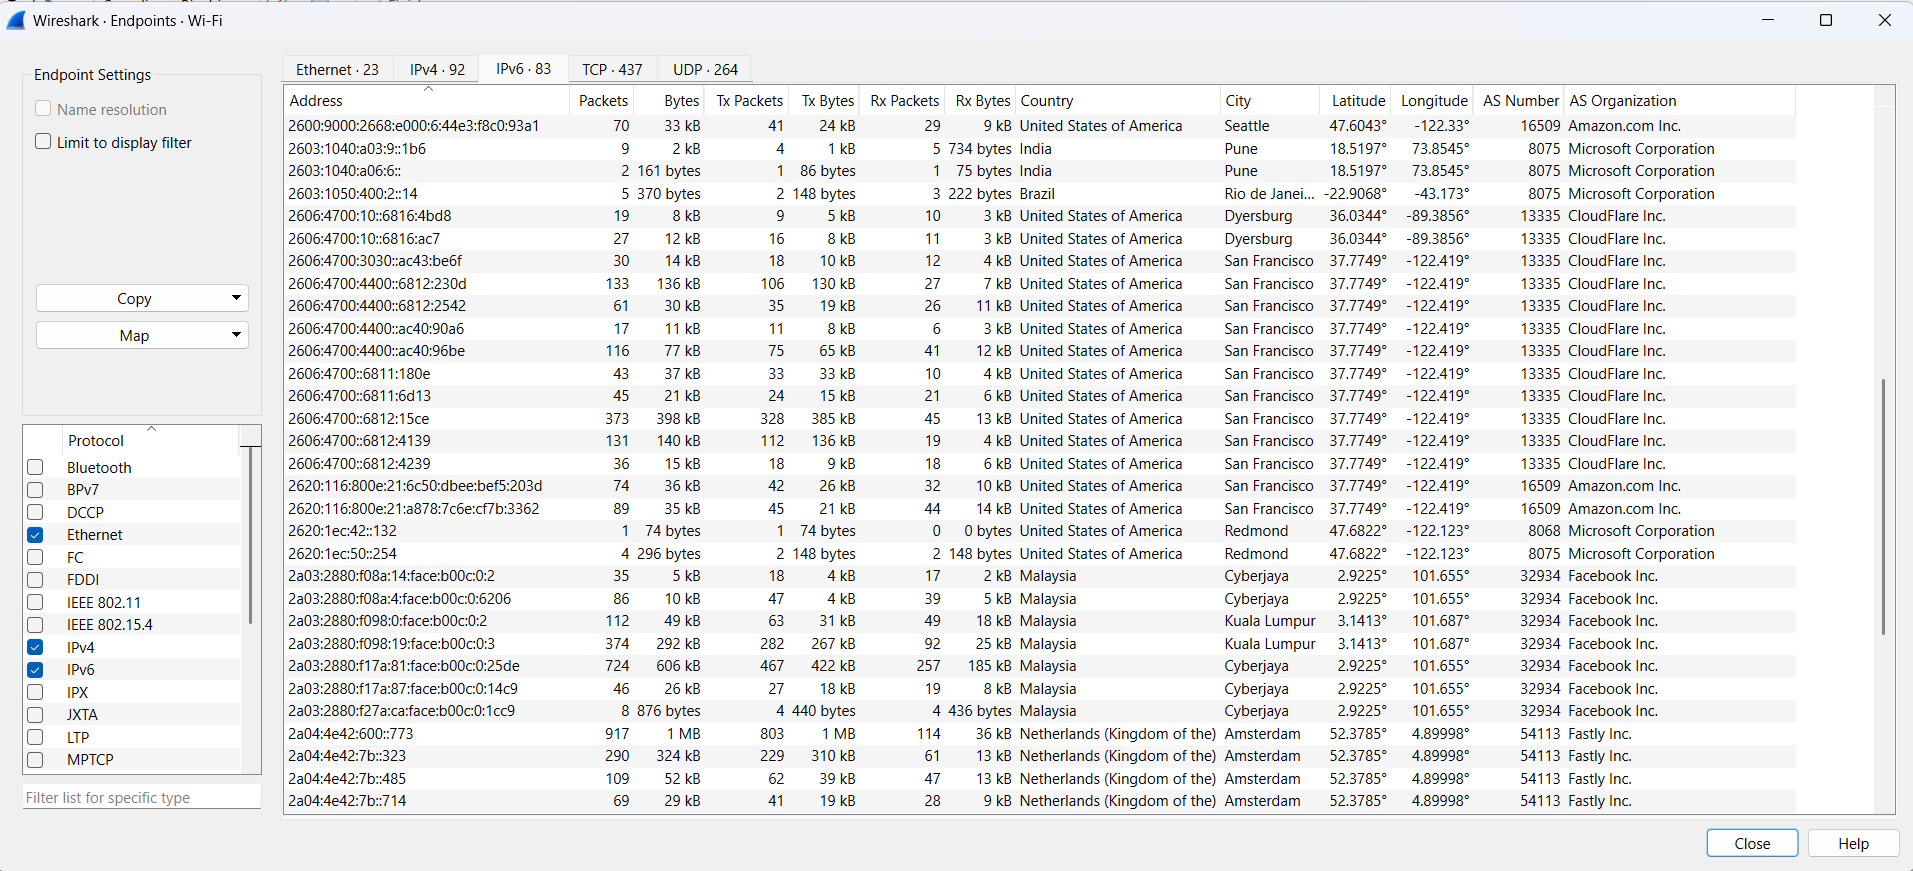
View geolocation for all endpoints #
Viewing a single line of traffic may or may not be useful depending on your goals. Wireshark has the ability to display geolocation for all of the endpoints captured. Let’s take a look. In the menu bar, click on Statistics -> Endpoints.
Inside, you can click on the IPv4 or the IPv6 tab and you can view the related geolocation data along with the Autonomous System (AS) info. This overview is a great way to quickly spot anomalous data or suspicious traffic.
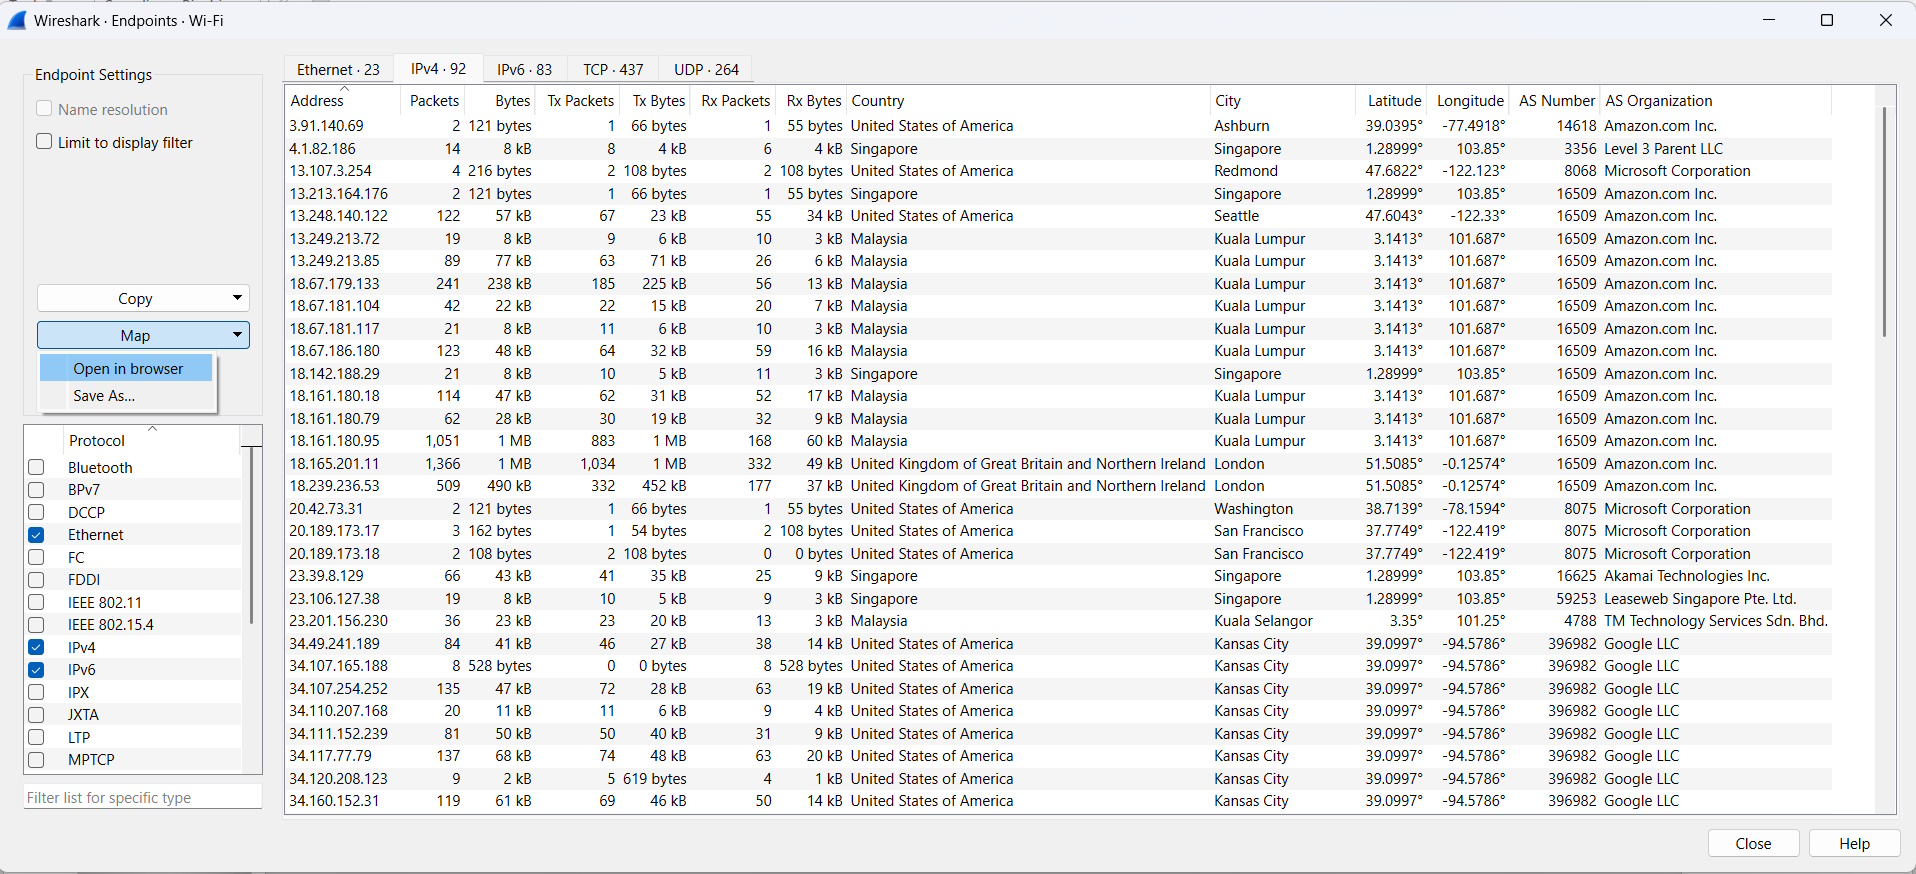
Visualize the geolocation on a map #
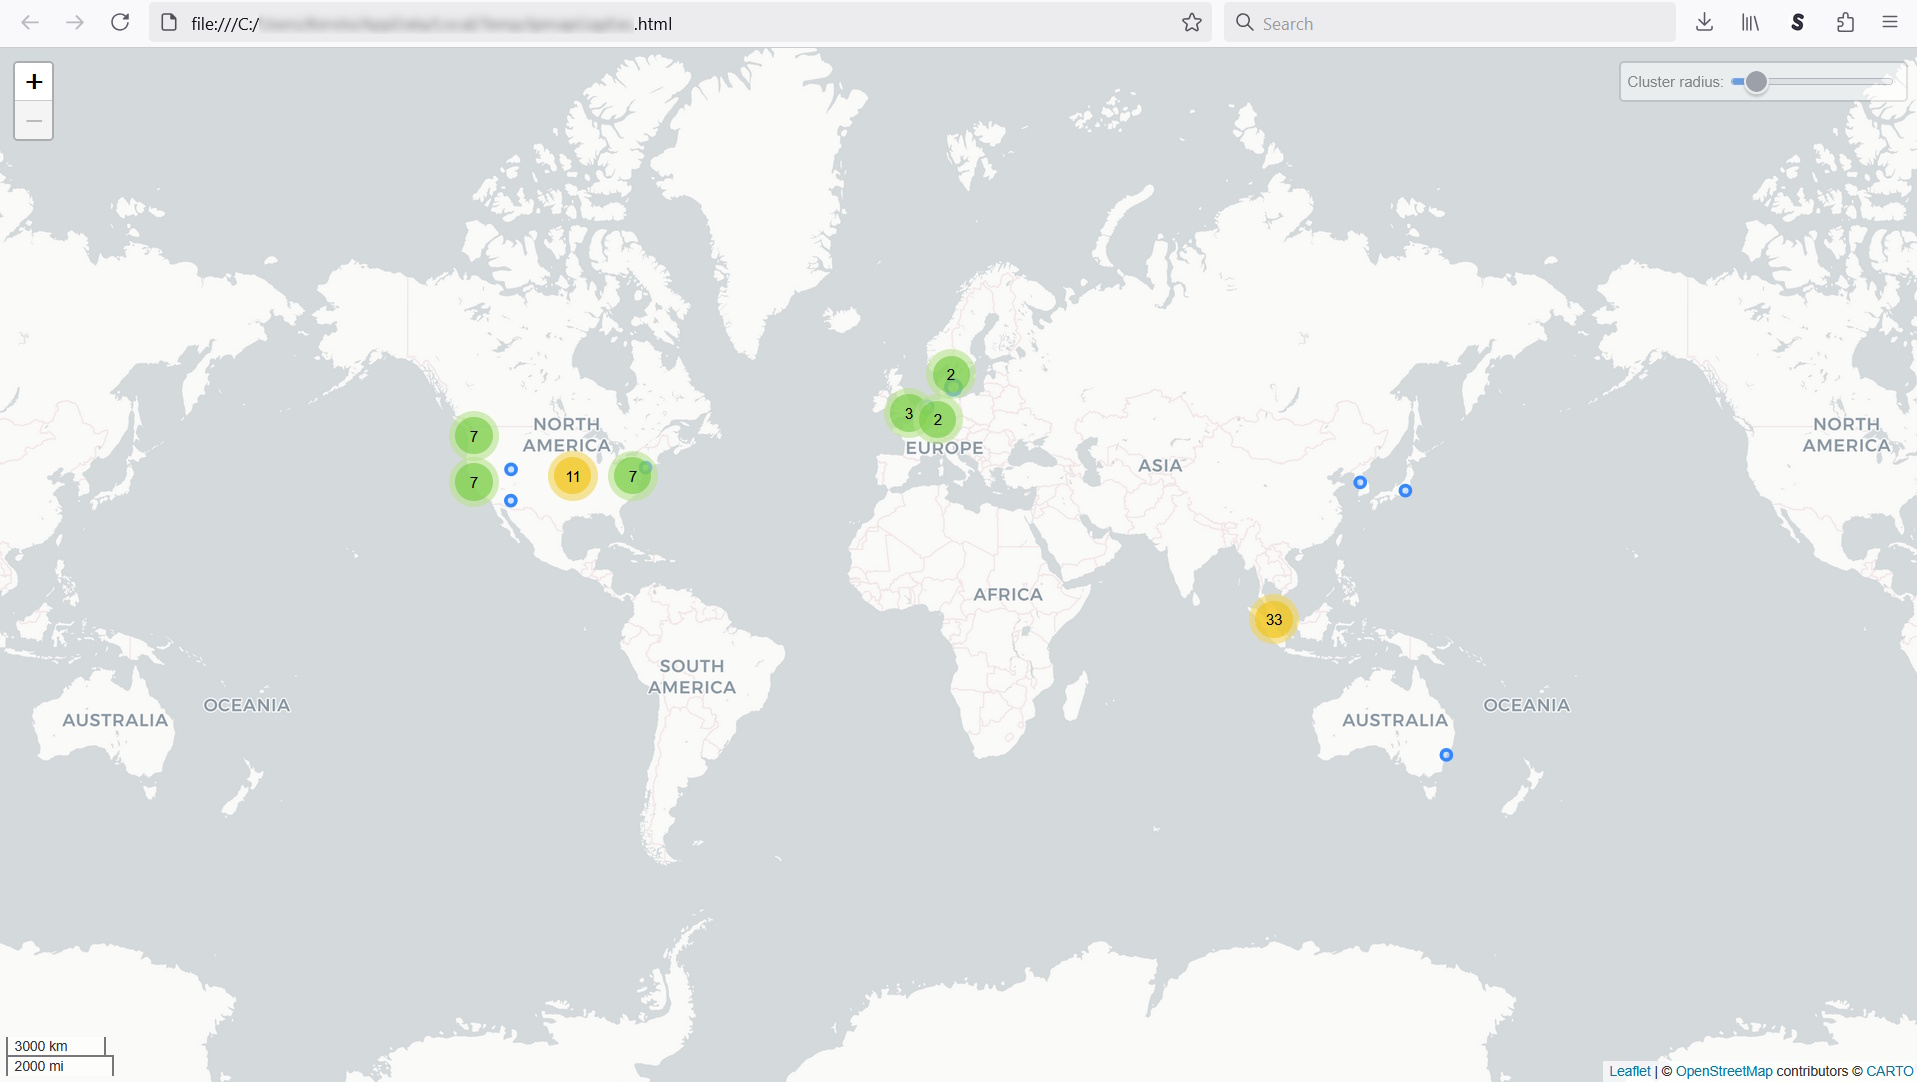
Sometimes, you just need a form of visualization to do your job more efficiently. Fortunately, Wireshark can easily plot the geolocation on a map for your viewing pleasure. Click on Map -> Open in browser.
You can now see the geolocation data rendered on a map below. With just a glance, you can easily see if you have traffic coming from any region that you don’t expect to receive traffic.
Use geolocation to filter the traffic data #
The geolocation data is also handy if you wish to filter your captured traffic data. This could be especially useful when you are doing network troubleshooting. No point viewing unrelated traffic.
Let’s close the Endpoints window and go back to the main window. For example, if I want to filter traffic coming from Sydney, I can just right-click on the city name and click Prepare as filter -> Selected.
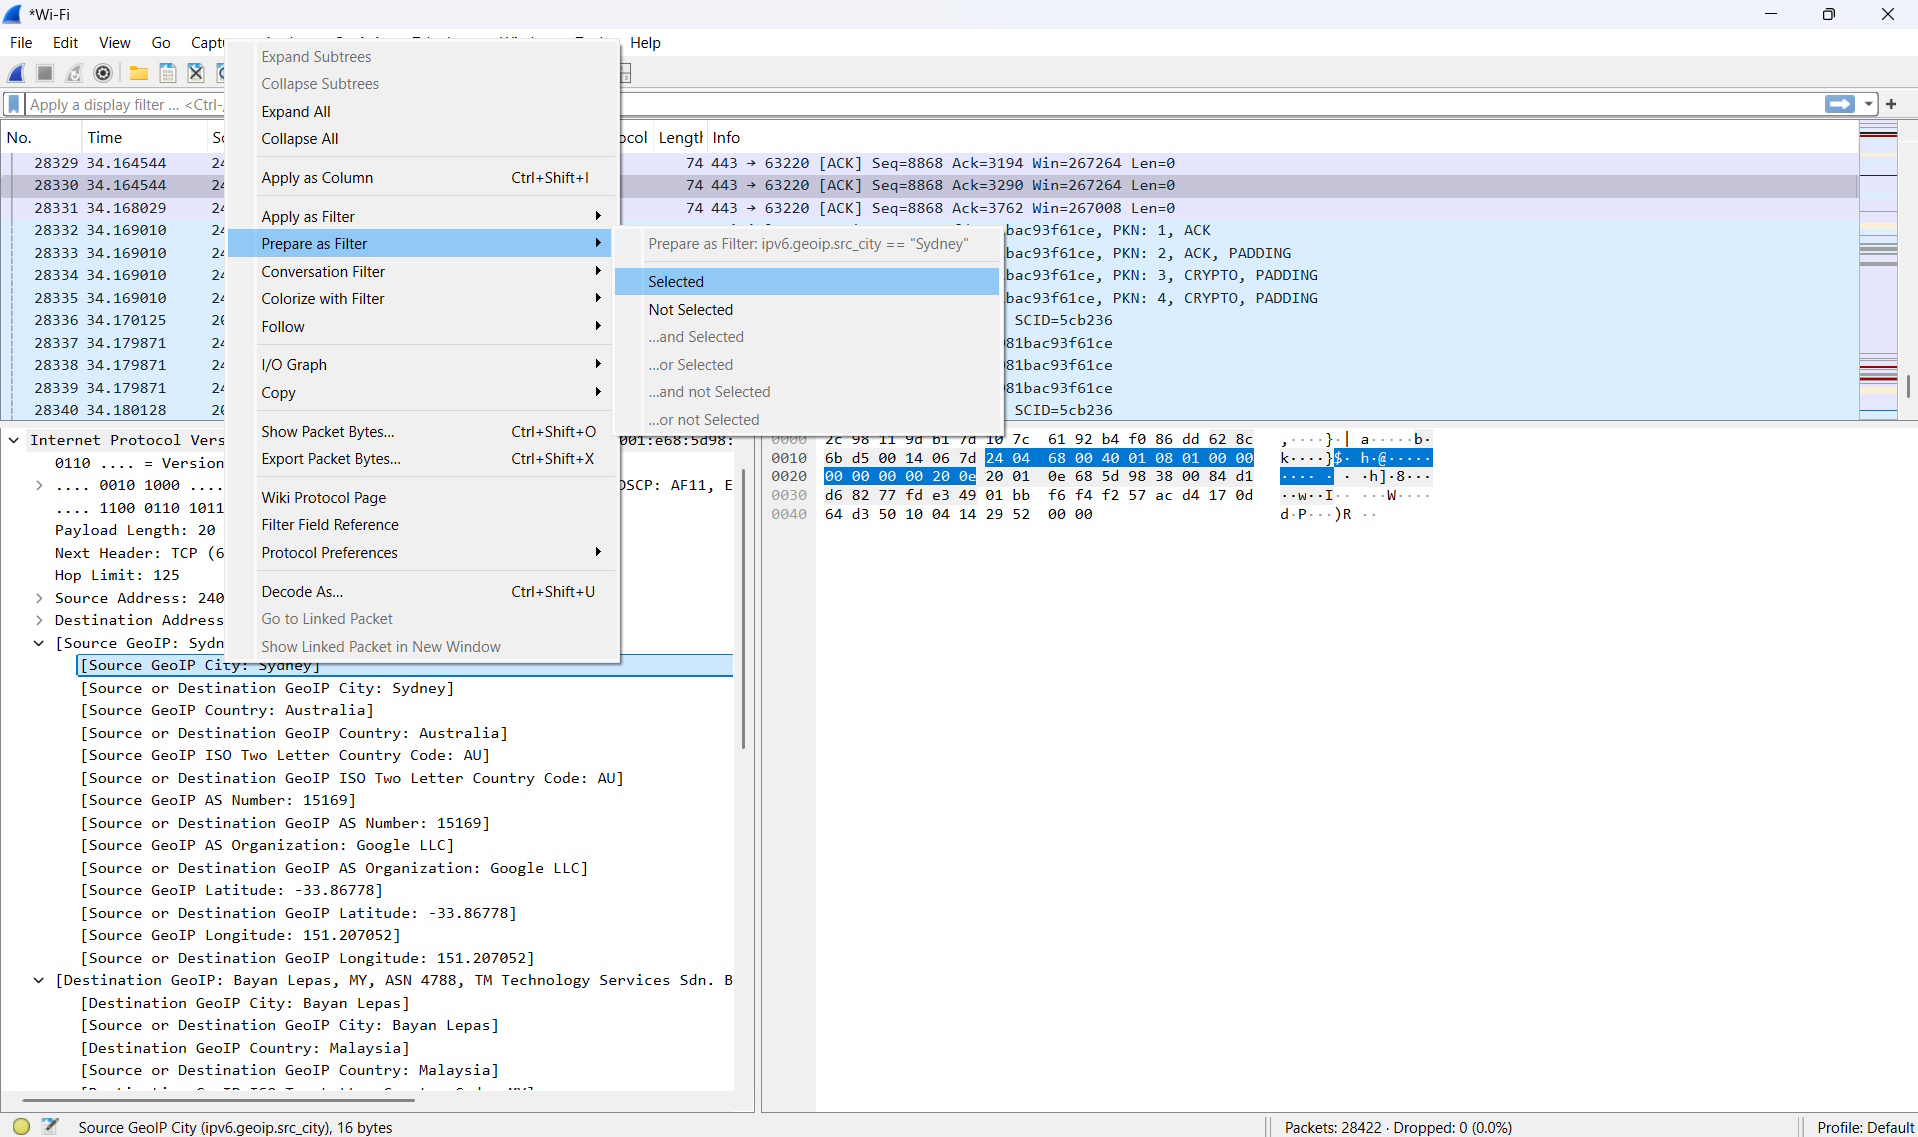
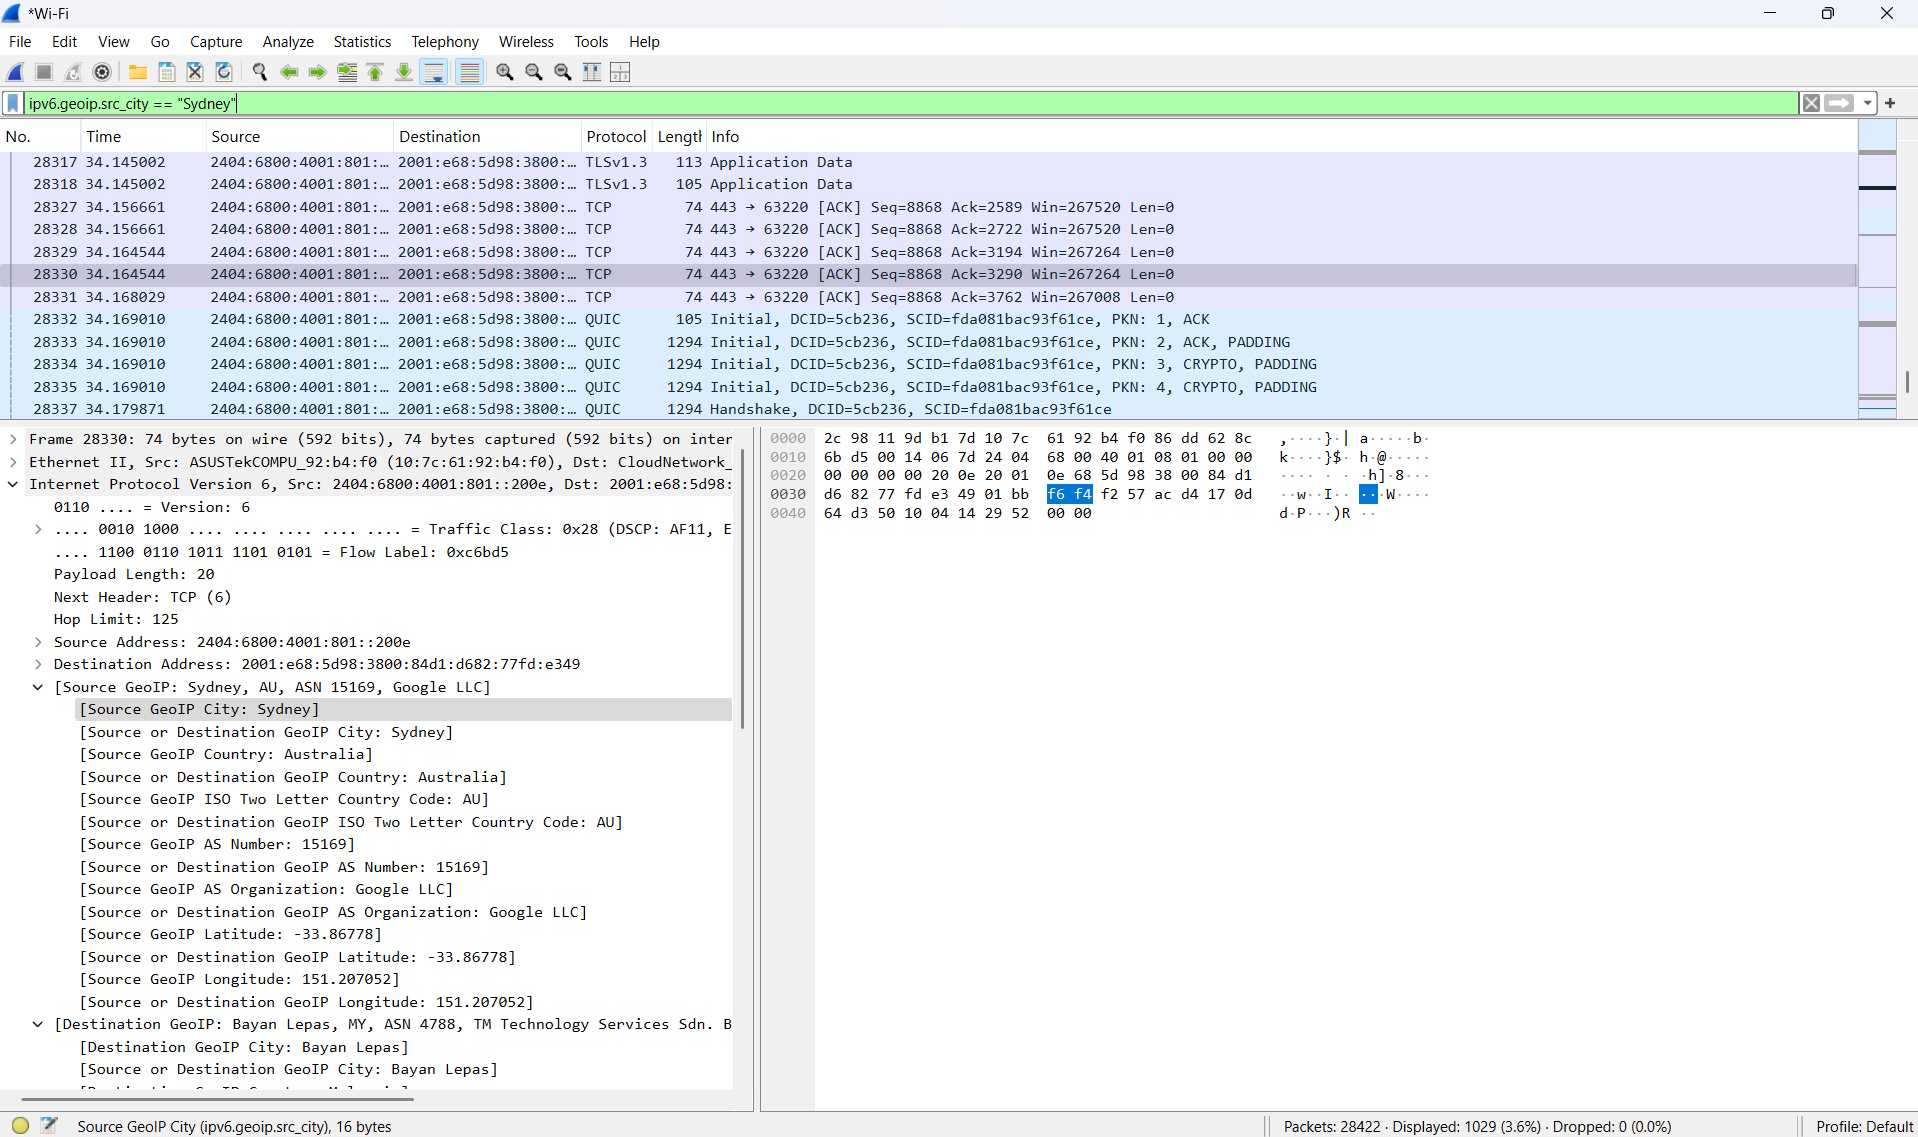
You’ll now see the below with the filter created in the green bar below. Just press the arrow at the end of the green bar to apply the filter.

Now, you will only see traffic coming from Sydney.
Conclusion #
It is that simple to use IP2Location LITE DB9 and ASN MMDB files in Wireshark to provide geolocation and ASN data enrichment. Hopefully, this article can guide IP2Location users to fully utilize the power of IP2Location within Wireshark.
Disclaimer #
MaxMind and GeoIP are registered trademarks of MaxMind, Inc. Wireshark and the “fin†logo are registered trademarks of the Wireshark Foundation.


